Monday, December 21, 2009

The Smells and Tastes of the Season...

Ahhh, the smell of fresh baked cinnamon rolls, or the "yumminess" of decorated sugar cookies...what Santa could resist these cookies waiting for him as the jolly old man comes down the chimney? 
Cookies and hot cocoa for Santa

Best Sugar Cookie Recipe
Here is my sugar cookie recipe that I have used for many years. It is so yummy...soft and just sweet enough. They melt in your mouth. They are good just iced with buttercream frosting and sprinkled with cookie sprinkles, but when I want them to be really special, I dip them in fondant and then decorate them.   
3/4 cup butter, softened
1 cup granulated sugar
2 eggs
1 teaspoon vanilla
2 1/2 cups flour
1 teaspoon baking powder
1 teaspoon salt
Cream butter, sugar, eggs and vanilla until fluffy. Blend in flour, baking powder and salt. Cover and chill at least 1 hour. Heat oven to 400 degrees. Roll dough 1/4" thick on floured surface. Cut into shapes. Bake on parchment lined cookie sheet for 6-8 min. or until just set and barely brown on bottom. Do not overbake. Ice with fondant or buttercream icing if desired. Makes 2 1/2 - 3 doz. cookies. (You can even just use a can of store-bought icing and sprinkle with red and green sprinkles.)

Sugar cookies dipped in fondant and drying on rack
Cute snowman
Christmas tree and stocking

Saturday, November 28, 2009

Chocolate Mint Mousse Wedding Cake

A visitor to my website requested some information about making a chocolate mint mousse cake for her daughter's wedding. First of all, she lives at a very high altitude, so it is necessary to make a few changes when baking the cake. For the chocolate mint cake, I use Duncan Hines Dark Chocolate and add 1 tsp. of mint flavoring to each cake mix. I also add 1/4 cup flour and an extra egg (4 total) to each mix. If I am using 2 mixes (I never mix more than 2 mixes at once), I add 7 eggs instead of 6. Also, be very careful not to put too much batter in the cake pans. Too much batter will also make the cakes sink in the middle. I used to always bake my cakes at 325 degrees instead of the recommended 350 degrees because the cakes turned out moister. At high altitudes, I have to raise the temperature slightly to 335 degrees. Just be careful not to overbake the cake. 


The layers of the cake are torted (split) and filled with a chocolate mint mousse. The recipe is as follows:
1 (8 oz.) package cream cheese
Approx. 1/3 cup cocoa powder
Approx. 1 1/2 cups powdered sugar
2-3 cups of whipped topping
Andes mint pieces


Beat cream cheese until soft and smooth. Scrape bowl and gradually add the cocoa and powdered sugar and beat until smooth and fluffy, scraping the bowl often. Fold in the whipped topping and mint pieces.
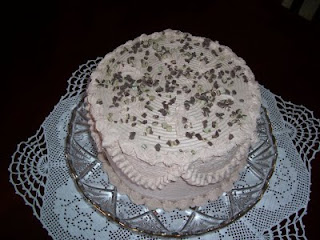
I would normally ice this cake in a chocolate whipped cream with Andes mint pieces sprinkled on top, but for a wedding cake, I would ice it in a regular whipped cream. One of my past entries will give you the best recipe for a stabilized whipped cream icing. It is important that the cake stays refrigerated after decorating it until just before setting it up. Here are two pictures...one shows the chocolate mint mousse cake, and the other shows a wedding cake iced in whipped cream.                                           

Chocolate Mint Mousse Specialty Cake

Wedding cake iced with whipped cream icing

Friday, October 23, 2009

Tips on working with chocolate ganache


  1. Make sure your ganache is the proper consistency. Do not add too much cream.
  2. Your buttercream icing underneath should also be the proper consistency. The trick is to make the icing spread smoothly, but don't make it too soft, or it will melt.
  3. Do not let the cream boil before adding your chocolate...it should be steamy, but not boiling. After adding your chocolate, keep stirring until smooth.
  4. If your ganache is too warm, let it cool slightly before pouring it onto your cake.
  5. Position your buttercream iced cake (that you have placed on a cake board that is the same size as the cake) on a cooling rack on top of a cookie sheet or bun pan, and then pour on the ganache and let it drip down to cover the sides. When it has set up slightly, move the cake to your platter or dish or cake board that you will be serving it on. The excess ganache should remain under the cooling rack on the cookie sheet, and should be starting to setting up. You can scrape it up and add it to any leftover ganache and use it for decorating. 
  6. Now you can add a bottom border and whatever other decorations that you choose. Remember, you can let the ganache set up a bit longer and then use it to make perfect chocolate roses. 

Thursday, October 22, 2009

Icing Under Ganache

Tuesday was my daughter, Paula's 26th birthday, and so she invited a few friends over for cake and ice cream. The cake she requested was vanilla with chocolate mousse filling, covered with a dark chocolate ganache. I filled the cake with two layers of the chocolate mousse and put a layer of rich chocolate buttercream in the middle. I also iced the cake with the chocolate buttercream, which made the chocolate ganache go on much smoother. The cake was just what Paula ordered, and was a hit with her friends. Happy Birthday, Paula!


Sunday, October 11, 2009

Using new silicone fondant mat


My new fondant mat arrived just in time for me to use to decorate my wedding cake for this weekend. It worked like a charm...just as I had hoped. I applied a very thin coat of Crisco before rolling out the fondant and it worked perfectly. No more sticking fondant or cornstarch all over my kitchen.


It was so fun to deliver this cake and see that the scroll work matched the design on the tablecloth overlays and the color of the roses matched almost perfectly to the color of the other silk roses they had used in the decorations. I was very pleased with the results. I also delivered 3 specialty cakes along with the wedding cake...Shirley Temple cake, but used white chocolate shavings instead of curls for easier cutting, Luscious Lemon, and Chocolate Mint Mousse. The flavors of the wedding cake were chocolate mint with chocolate mint mousse filling, and yellow with cream cheese and fresh strawberries. The flowers were done in royal icing, and the red was airbrushed on, leaving the bottom of the roses white, so as not to bleed on the white cake.


Thursday, October 8, 2009

New website!!


I am excited to announce that my new website went live today! I put the new site together myself, with a little tweaking from my son, Brent. I'm pleased with the way it turned out, and hope that you will enjoy browsing through it. If you have any comments, I would be happy to hear from you.


Monday, September 28, 2009

Using whipped cream icing on cakes

I had a request for whipped cream icing on the last wedding cake I designed. The best whipped cream I have found to use on wedding cakes is a stabilized whipped cream made with Rich's whip topping base. You add 2 parts of the base to 1 part of heavy whipping cream and whip with the wire whisk attachment of your mixer on medium speed until soft peaks form. For this particular cake, I also added vanilla and some ivory color. This is a great tasting whipped cream, goes on smoothly, and holds its shape well. You can also add other liquids to this base for different flavors. I buy it by the quart size, and it comes frozen, but I believe you can get it in larger sizes also. The flavors for this cake were spice with cream cheese filling, chocolate with coconut pecan filling, and banana split (layers of whipped cream with bananas, pineapple, and strawberries, drizzled with chocolate syrup and sprinkled with nuts). The flowers were very simple, yet elegant, as was the design of the cake. I displayed the cake on a 22 inch round silver plateau, which I believe adds greatly to the presentation, making it a beautiful centerpiece. The wedding venue was the officer's club at Petersen Air Force Base.


Sunday, September 20, 2009

Combining fillings...


Yesterday we had a farewell party for our son-in-law Eddie, as he goes off  to AF basic training. He requested a yellow cake with raspberry filling. As I began decorating, I realized that I did not have quite enough raspberry filling to fill a half sheet, so I first put a layer of cream cheese filling, and then the raspberry over that. I called him after I had already filled and iced the cake and asked him if he liked cream cheese with raspberry, and thank goodness he said he did. I actually combine fillings quite often on cakes I do. Some of my favorites are cream cheese with fresh strawberries or lemon filling, fudge filling with raspberry, and whipped cream with fresh fruit. By the way, the cake was a big hit at the party!

Friday, September 11, 2009

Carrot cakes and new cookbook...


My son-in-law, Eddie, called and asked if I could have a 1/4 sheet carrot cake ready for him to take to work on Friday as a thank you to his co-workers, as it is his last day at T-Mobile. So I found this great recipe for carrot cake and cream cheese icing in my new cookbook, America's Test Kitchen Family Baking Book. The recipe calls for a whole lb. of carrots, which makes the cake moist, and a perfect blend of spices. I'm still having a little problem with my carrot cakes sinking slightly in the center due to high altitude, even though I added a little extra flour. I think next time I will try raising the oven temperature slightly and baking the cake for a shorter time. The cream cheese icing recipe called for an extra ingredient that I have not used before...sour cream. This recipe is not too sweet and whips up very nice and fluffy. This is not an icing you can do detailed decorating with, but it ices the cake very nicely, and tastes great!

Cream Cheese Icing

(2) 8 oz. bricks of cream cheese
10 T. softened butter
2 T. sour cream
1 1/2 t. vanilla extract
2 cups powdered sugar

Beat the cream cheese, butter, sour cream, and vanilla together at med. low speed until smooth. Add the sugar slowly and beat at low speed until smooth. Turn up the mixer speed to med. high, and beat until light and fluffy.


Friday, September 4, 2009

Cake artistry...mixing colors

I have often considered myself an artist. However, because I am a cake decorator and not a painter, my medium is icing instead of paint. My tools are decorating bags, spatulas, and paste and/or airbrush food coloring. My palette is mixing bowls and plastic containers. I thought about this last night as I was decorating the above pictured cake. It had several different shades of browns. When I work with browns, I normally always use chocolate buttercream and add to that, because it tastes better than just using plain old brown paste color. For example, the shoes and the underside of the hat are done with full strength thinned down chocolate buttercream. The upper portion of the hat and jacket were made by adding white buttercream, and for the hair and middle part of the sunflowers, I added a touch of red icing to the chocolate. Even the gray color for the gardening gloves was made from white buttercream, with a touch of chocolate and a very small addition of blue. This was a fun cake to do. I designed it for Michelle, a friend of mine who works at a retirement home...hence the interesting birthday names. I wanted to do something with sunflowers, since this is sunflower season in Colorado, and I thought the woman with the green thumb and large nose added character. The flavor of the cake was strawberry with fresh strawberry mousse.

Saturday, August 29, 2009

Finding old cake patterns on line


I hadn't put this design on a wedding cake since we left AZ and I needed to find the pattern so I could get approximately the correct size of scallops. Since I knew which Wilton yearbook it came from, I just googled Wilton cake patterns and then typed in scallop pattern, and walla...there it was. Don't you just love the internet? This was a cake I delivered to Fort Carson. In previous years, I always put this design on a buttercream frosted cake, even though the design was originally meant to be on a fondant covered cake. It always looked OK before, but even looked nicer this time around on the fondant. This was a yellow cake filled with cream cheese and fresh strawberries...yumm. Also, it seems each time I do a cake in fondant, I learn something new. Last night, I discovered that I would probably save time and allot of cornstarch if I had a no stick mat, so I will invest in a silicone treated mat before I do my next fondant cake. The mat that I made myself from clear vinyl ends up sticking when I thought it wouldn't.

Monday, August 24, 2009

Follow-up on Anniversary cake...

The poor little anniversary cake...it just keeps getting forgotten. Bruce forgot to take it to work this morning, so I finally took it over to a friend for her family to enjoy.

Anniversary cakes...and interesting story...this is a first!


I offer an anniversary cake option to my wedding cake customers. Normally, when they order a tiered wedding cake, I do not charge them for the top tier-it is just included in the cost. I also give them the option, however, to pay for the top tier, and then I include a coupon which entitles them to a free anniversary cake for their first anniversary. Many brides prefer this option so they can have a fresh cake for their anniversary. It also means they don't have to use up extra storage space in the freezer. Some more traditional brides still opt out for saving the top tier. So anyway, this next story that I'm about to relay is very interesting to say the least, and a definite first time for me. . .

About 2 weeks ago I received a call from a customer whose wedding cake I had designed a year ago. He said he was calling to order the anniversary cake that he received the coupon for. Then he informed me that he had filed for divorce, and that because his mother paid for the cake, that he would like to order the cake for his mother and himself. He also warned me that his "soon to be X-wife" would possibly call to order a cake also and I should just refuse because his mother was the one that paid for the cake. I let him know that I thought that would most likely not happen. So, then I could hear him having a discussion with his mother in the background about what flavor they wanted to order and when he would like to pick it up. It was agreed that he would pick the cake up last Thursday evening...I would call when the cake was ready. When the cake was finished, I called the customer, and he informed me that he would not be able to pick up the cake that night, but would have to wait until the following evening to pick up the cake. I told him it would not be as fresh, but I would put it in the refrigerator, and he could call before he came. So, here it is late Sunday night-or early Monday morning-and the cake is still sitting in the refrigerator. Bruce will take it to work to share with his co-workers this morning. They will love it, even though it is no longer fresh. And no, I will not do another cake for this inconsiderate customer. Hmm...I wonder why this marriage didn't last.


Monday, August 17, 2009

Detail work...outlining with buttercream


I was looking at some of my cake pictures recently, comparing some of my more recent cakes with some done several years ago. Even though all were nice, the more recent cakes have much better detail and look nicer. I think what has made the difference is that I now use buttercream to outline, instead of piping gel, as I had many years ago. Often, I use chocolate buttercream, the darkness depending on the pattern I'm working with. I think I have also gotten pickier about being exact with my fill-in and detail work. For example, on this last cake I did for a friend's baby shower, I ended up doing the faces over again, because I was unhappy with the way the eyes looked first time around. Took me forever to decorate, but I was happy with the end result.


Friday, August 7, 2009

Fill-in Color Techniques

I received an email recently from someone who had visited my website and blog, asking me about the techniques I used to fill in the color on some of my party cakes, specifically the cakes shown on this post. Thanks to Julie for her question.

After pressing the pattern into the buttercream frosting, I outline the pattern with a normal consistency buttercream. To make the flow-in color, I add liquid paste color to the buttercream, and then thin it with Karo corn syrup. Using writing tips, I flow it into the the outlined pattern.

Saturday, July 25, 2009

Fondant Ribbon Cake...Learning new techniques


Even though this looks like a very simple cake, it gave me the opportunity to learn several new techniques, while at the same time tweaking my fondant recipe and techniques. I'll share some of what I learned. I learned allot by reading Janelle Smith's blogs and studying some of the tutorials that she had listed. First of all, I learned that it is easier to put fondant on a chilled cake. Janelle suggests filling and icing the cake and chilling it for a couple of hours. Then take it out of the refrigerator and spritz it with a little water, cover it with the fondant and chill it again. Take it out of the refrigerator a couple of hours before serving it. It will glisten a little from the condensation, but it is OK. This is especially good when you have a filling that needs to be kept cool. This particular cake was fudge marble with chocolate mousse filling. I also purchased a fondant smoother, which I liked using better than only my hand to smooth.

Making the fondant ribbon and bow was definitely an experiment. For the color I used used a shrimp color luster dust mixed with a little vodka (yes, I know you're thinking I went to a liquor store). Actually, I had the bride get me one of those little mini bottles of vodka because I told her that I would feel uncomfortable purchasing it myself. She was OK with that. Carol, at the local cake store where I get some of my supplies, showed me how you can intensify the color of the luster dusts by adding a clear alcohol, such as vodka. You use alcohol because it dries quickly. Anyway, after combining the luster dust with the vodka, I sprayed the fondant ribbon and bows with my airbrush. It gave it the pretty shiny finish I wanted. I had to add lots more sugar and a little meringue powder to the fondant dough to make the bows stiff enough. I think next time I make the bows I would maybe use gum paste instead of fondant, but the ribbon was OK. To make the blush color of the fondant that I covered the cake with, I added several drops of flesh airbrush color to the melted marshmallow mixture before adding the powdered sugar.

The bride furnished the round silver pieces that we used in the center of the bows. I still haven't gotten used to the idea of a finished wedding cake not having anything on top, but it was the look the bride wanted.

Here is the new fondant recipe I used from Janelle's blog. Just make sure you add enough sugar, make it the night before so it can firm up, and that you use plenty of cornstarch when rolling it out.


Marshmallow Fondant

1 bag mini marshmallows (16 oz.)
2 TBS water
2 tsp. corn syrup
5 to 5 1/2 cups powdered sugar
1/4 cup shortening

Combine marshmallows and water in a glass bowl. Microwave for about 40 seconds at a time stirring in between until it becomes a soupy mixture. Stir in corn syrup. Mix in about a cup of powdered sugar. Pour mixture on work surface covered with about 3 cups powdered sugar and knead like bread dough. Coat hands with shortening frequently. Gradually add more powdered sugar as needed until the fondant is smooth and doesn't spread much when you let it sit for a few seconds. Careful not to add too much sugar or the fondant will be crumbly and hard. It's better to make it too soft. Wrap well with plastic wrap and let the fondant firm up overnight before using. If the fondant is stiff the next day, microwave it a few seconds to warm it up and make it more pliable.


Chocolate Fondant

1 bag mini marshmallows (16 oz.)
2 TBS water
2 tsp. corn syrup
4 to 5 cups powdered sugar
1/4 cup shortening
a little less than 1/4 cup cocoa powder

After melting your marshmallows and water, stir in corn syrup and cocoa powder. To achieve a rich brown color, use Dutch Process cocoa. Hershey's makes some called Special Dark. Using regular cocoa will make a soft brown color. Knead mixture into powdered sugar. You'll need less sugar since the cocoa powder absorbs moisture so careful how much you add. Better to make it too soft since you can add more sugar the next day if needed. Wrap well with plastic wrap and let rest overnight.
*Do not add melted chocolate to the fondant. It will seize up and become a crumbled mess.

Sunday, July 19, 2009

Tiffani's Birthday Cakes

My friend and hairdresser, Tiffani celebrated her 30th birthday yesterday. The cake she requested was actually a cheesecake with chocolate dipped strawberries. The strawberry glaze was made with Danish Dessert.

Her husband threw a surprise birthday party for her later that night, so I did another cake. This time it was actually a cake, but still had cream cheese and strawberries for the filling because I knew that's what she liked. So yesterday she got a double dose of my baking skills. I have done cakes for her entire family, with the exception of her daughter, Rebekkah, and now they are moving to Utah. . . so sad. I told Rebekkah she would have to come back to Colorado in October, so I can make her a cake.

Wednesday, July 15, 2009

Chocolate ganache

This morning I whipped up a cake at the last minute for Bruce to take to work for his birthday. When I say last minute, that was about what happened. First of all, last night I had planned to bake the cake after it cooled down in the house and I could open up the windows. So, at 10:15, I got the cake mix out and realized that I didn't have enough eggs. So I went to the store at 10:30 pm to buy eggs, came home and baked the cake. I got up this morning a little after 5 am, so I could put the cake together and have it ready by no later than 6:30. I decided to make it a Boston creme flavor, since I knew Bruce would like that, so I torted the layers, and put bavarian creme filling between two of the layers and put a rich chocolate buttercream between the other. Then I covered the entire cake with a chocolate ganache. I had lots of strawberries that I had purchased a couple of days ago and plenty of chocolate, so decided to dip strawberries to add to the top of the cake. As you can see, it wasn't perfect (lettering, for example), but Bruce said it tasted great! I guess it wasn't bad for about an hour or less of work.

Last minute birthday cake covered in ganache and decorated with dipped strawberries

Chocolate ganache is a combination of whipping cream and melted chocolate that is poured over the cake and sets up as it cools into a rich chocolate coating. I usually do a crumb coating of chocolate buttercream on the cake first. You put the cake on a rack over a drip pan, and pour the ganache over the cake and then let it set up. Any ganache that's left over you can let set up to a stiffer consistency and then use it to decorate the cake. I experimented this morning to see if I could use some leftover ganache from the last cake I did. So I melted it in the microwave. When I did that, the cream and chocolate separated, so I could not use it to pour on the cake. However, what I did do was pour it into my KitchenAid and beat it until the cream and chocolate combined again and then whipped it with the flat beater attachment until it resembled the consistency of a chocolate buttercream. It became a little lighter in color than the original ganache, but you could use it for decorating, borders, or for making chocolate truffle candies. It was good to know that at least it didn't go to waste.

Chocolate Ganache Recipe:

(2) 12 oz. packages chocolate candy melts (I like Guittard, but you can use any good quality chocolate candy melts or good chocolate cut in small pieces.)
About 3/4 cup cream

Heat the cream in a medium saucepan until hot, but not boiling. Remove from heat and add the chocolate and stir until smooth. Add more cream, but only a little at a time, if necessary. Pour over cake and let set. Add decorations if desired.

Chocolate Lover's cake covered in ganache

Whipped ganache

Chocolate buttercream

Monday, July 13, 2009

Teaching an Old Dog New Tricks

In my case, it's "teaching an old cake decorator new techniques." Lately, I have been researching new decorating techniques and recipes on the internet. It's never too late to learn something new, right? Anyway, since we've moved to Colorado, I have never been quite happy with my buttercream icing recipe. It just doesn't go together as well as it did back in Arizona. It could be the altitude, the humidity, or lack of humidity, or whatever. All I know is that it's not ever as smooth as I wanted it. So, I have been researching ideas to "tweak" my recipe, and I think I finally came up with a recipe I like. First of all, I found an article somewhere that talked about the fact that because Crisco now uses a "no trans fat" recipe, you have to add more fat back into your icing recipe. So I now use a small amount of butter in with my Crisco, and add cream instead of water. I beat it a bit differently, too, and walla...nice smooth buttercream again. I also find that depending on what I'm icing, and whether I need it to crust or not, will depend on how much butter or cream I use. For example, I did another cake for an Air Force Academy promotion today and I needed the icing to crust so I could press the pattern into the top, so I used less milk and butter than I did for a cake I did over the weekend that I just needed a basic outline and the rest was done freehand. I also want a stiffer consistency if I'm making flowers. Go ahead and experiment with this recipe until you get it the consistency you want. So here is the basic recipe:

1-1 1/2 cups Crisco shortening
1/2 - 1 cup unsalted butter (room temperature)
(Total shortening and butter should equal 2 cups)
1/2 tsp. salt (leave out or use less if you use salted butter)
1-2 tsp. butter vanilla emulsion
8 cups sifted powdered sugar
4 - 6 oz. cream

You must use a heavy duty stand mixer (like a Kitchenaid) to make this recipe. Using the flat beater attachment (this will add less air bubbles and make a smoother icing), combine the butter and Crisco and beat 5-10 minutes at medium speed until very smooth and fluffy. Add flavoring and salt and beat again. Scrape bowl several times while beating the shortening mixture to make sure it is all incorporated. Next, add the powdered sugar a few cups at a time until it is all mixed in. You may not need to sift it as long as you don't have a bunch of lumps in it. It seems to turn out smoother for me when I sift it. (Tip: just use a large metal sieve to sift-it works better than a sifter.) At this point, it will be very stiff. Then add the cream, a little at a time and continue to beat with the flat beater at medium until smooth and fluffy, scraping the bowl often. Start with only 1/2 cup of cream, and add just a little more at a time until it is the consistency you want. I use 4 oz. (1/2 cup) for a good crusting buttercream, and 5 1/2 or 6 oz. for a very soft (almost like whipped cream) consistency.

Cake using stiffer consistency buttercream

Cake using softer consistency buttercream

Sunday, June 28, 2009

A Western Wedding...


Yesterday I delivered a wedding cake to a reception with a true western flair. Decorations included hay bales and saddles, all very tastefully done. The cake top ornament was a cowboy bride and groom, with hat, rope, and wooden horseshoe. I used "rope" borders on the cake with tiny sahuaro cactus accents. The drop flowers were made with royal icing and then air-brushed to match the desired color. A rope and miniature hay bales were used to complete the effect. The design on this cake works well with an oval-shaped cake. The flavor was yellow with a whipped cream and strawberry filling.


Monday, June 22, 2009

Party Cakes...

Party cakes are allot of work. They take extra time because you are usually working with several colors and a specific design that you have to come up with unless it's something that you've done before. I get allot of my patterns from google images. Of course, you can't charge as much for a party cakes as you do for wedding cakes, but sometimes you have to do the party cakes to get referrals for the wedding cakes, so it all works out in the end. I usually fill in as much of the design as possible with icing, and only use the airbrush for shading or background. It makes for a nicer finished product. Here is a picture of the cake I did today for my friend's daughter; she was into rainforests and wanted some specific things on the cake...gorilla, monkey with banana, and bird, so I ended up putting about 4 different patterns together to get the one desired picture. The cake was yellow filled with whipped cream and fresh strawberries.


Sunday, June 21, 2009

Update on cake tasting day...

Yesterday afternoon was my cake tasting day for prospective brides. It was successful, even though I was pressed for time getting ready. We had several different flavors to choose from:
  • Fudge marble with bavarian cream
  • Lemon with cream cheese and fresh strawberries
  • Chocolate with fudge and raspberry
  • Spice with cream cheese pecan and white chocolate cream cheese frosting
  • Chocolate with coconut pecan filling
  • Banana split cake (everyone's favorite, of course)
Bruce was very helpful in cleaning up while I was talking with my customers. Since we had leftover cake as usual, we invited some of the neighbors we had not yet met over to take cake home. It was a great way to become acquainted and they loved the free cake.

Sunday, May 31, 2009

Especially for Star Wars fans...


Here's one of the seven cakes I decorated last week. I was asked to do a cake for Garrett, the son of my friend and hairdresser, for his tenth birthday. He wanted something from Star Wars and he let me use my decorator's prerogative to determine what I would put on the cake. I found this great picture of Yoda with a light saver. I thought it turned it out great, and I think Garrett enjoyed it.

Free cake tasting rescheduled for June 20...

My next free cake tasting for prospective brides is rescheduled for Saturday, June 20 from 1-4 pm. If you are visiting my blog and are interested in attending that day, please call me or email me to schedule a time during those hours.

Saturday, May 23, 2009

Delivering cakes in the rain...


Yesterday we catered a wedding reception for a friend of ours. It was supposed to be an outdoors reception, but, as we know, the weather here in Colorado Springs can be very unpredictable. So, at the last moment, it was decided to bring the reception inside the house. Diane has a very lovely large home, so it wasn't the end of the world, even though she had planned some beautiful decorations for outside. So anyway, we were late getting everything set up since it was a last minute decision. Everything turned out fine, except delivering cakes in the rain is not fun, and because it was raining when Bruce was bringing the cake in, the beautiful finish on the fondant was marred slightly by the rain drops. The cake was still very nice and, of course, tasted wonderful. We used a beautiful orchid spray on the top tier, and it was placed on a mirror and my newly purchased silver cake plateau, which was perfect for this type of cake design. The bride and groom chose some wonderful flavor combinations. . . chocolate mint with chocolate mint mousse, chocolate with peanut butter mousse, and fudge marble with cream cheese. The picture actually makes the cake look smaller than it was. . . the bottom tier was a 14 inch square and the cake plateau was 22 inches in diameter.

Friday, May 15, 2009

Graduation, Promotion, and Retirement Cakes

It's that time of year again...graduations, promotions, and retirements. This is a cake that I did last last night for an Air Force retirement. Of course, living here in Colorado Springs I have the opporturnity to decorate cakes for military celebrations, especially Air Force. These cakes usually involve alot of work since they usually deal with creating detailed emblems in icing. I can also design graduation cakes for specific schools--colleges, high schools, and middle schools--customizing your cake with a specific logo or emblem. Prior to relocating to Colorado, this was most often my busiest time of year. One year I baked and decorated about 20 cakes within a 3 day period. Of course, I didn't sleep much, and was beginning to run out of room to place the completed cakes, but some how I managed to get through. I'm not sure I could or would want to be that busy again, but I do enjoy the opportunity to do these special cakes. My skill and talent for detail comes through.

Friday, April 17, 2009

Another free cake sampling day...

For those of you who are visiting my blog as prospective brides, here is some information about my free cake sampling day. If you call me at 719.597.6918 to schedule an appointment, I would love to meet with you on the afternoon of Saturday, May 9th. I usually have about 5 or 6 different cakes for you to taste...a variety of different cake flavors, fillings, and frostings, so you can choose the flavor and look that you like the best. I also have many pictures for you to view. If you would like to that day, I can sit down with you and design/customize your wedding cake. Just remember that you will need to put a 20% deposit down to reserve your date. I look forward to meeting you.

Sunday, March 15, 2009

Kind and appreciative customers...a joy to work for!

I delivered another wedding cake out to Cathedral Pines today. The family of the bride was from a small farming community in Kansas, the family of the groom from Oklahoma, and they all came to Colorado Springs for the sole purpose of getting married, because they loved the area. I had been communicating only with the mother of the bride through mail and telephone calls. She had gotten my name from the manager of Cathedral Pines, and she just trusted me fully without ever meeting me personally. As I was setting up the cake, she had nothing but kind words, and was so appreciative. Then I began to think of the last several wedding cake customers I have had and how they have all been so kind and appreciate of my work. It is such a pleasure to work for them. Over the many years that I have been creating cakes, most of my customers have been kind, with the exception of only a few. What a wonderful thing it is to have people appreciate you for your talents...it makes it a joy to work. It makes me realize how fortunate I am to have a job where I can use my creative skills to bring others joy!

Saturday, February 14, 2009

Valentine's Day Wedding Cake


I did an interesting cake today for a Valentine's wedding. Actually, the bride and groom were already married, but renewing their vows. The cake was interesting because all of the decorations were done in fondant, even the borders. The hearts were all done free hand by rolling strips of fondant and then just forming them into different size hearts and putting them randomly on the background fondant, which, by the way, sticks together with just a little water. The bride also had beautiful roses to put on the cake, which finished it off perfectly. She had sent me a picture of this cake that she found on-line and asked me to duplicate it. I think it turned out pretty well for being the first time doing a cake with these kind of decorations. I always enjoy new challenges.


Saturday, January 3, 2009

Marshmallow Fondant

The last several wedding cakes I have done have been iced with fondant. I used to shy away from using fondant at all costs until I found a recipe on the Internet for marshmallow fondant. It is basically melted marshmallows and powdered sugar. I will leave the exact recipe later on this post. I love the way my cakes look when I use the marshmallow fondant. I used to smooth my buttercream icing to resemble fondant, since I wouldn't work with traditional fondant because I thought it tasted nasty and was very difficult to work with. I must say I did a pretty good job of smoothing it, but you could always tell that it didn't have that very smooth porcelain finish that fondant cakes do. Not only does the marshmallow fondant taste better, but it is more pliable and easier to work with, and it costs less than the traditional fondant. There is a lot of work involved in decorating a cake with fondant, and it still always takes me longer than I anticipate; therefore, the cost is higher, but is usually well worth the money. When a cake is iced in marshmallow fondant, you must first ice the cake in a layer of buttercream. This not only gives the fondant something to adhere to, but it makes that smooth finish on top. An added benefit is that if your guests still don't like the taste of the fondant, they can peel it off, and still have the buttercream underneath. Below is a picture of the cake that I did yesterday for Melissa Atkinson's wedding reception. The design and decorations were simple, but I thought the colors were striking, making for a beautiful finished product. The cake flavors were fudge marble with chocolate mousse, chocolate with chocolate mousse, and yellow with raspberry mousse.


Recipe for Mashmallow Fondant:

(1) 16 oz. package Kraft miniature marshmallows (it is best to use a quality brand)

3 Tablespoons water

Flavoring

2 lb. C&H powdered sugar ( I always use C&H)

Crisco

Cornstarch

In a large bowl, melt the marshmallows with the water in the microwave, stirring after each 30 seconds. This should take approx. 2 minutes total. Stir until completely smooth. Add whatever flavor you want to compliment your cake. I most often just use my butter vanilla flavoring. Also, at this point you can add coloring or chocolate, if desired. The mixture will be pretty runny. Add about 3/4 of the sugar and mix with a large spoon until incorporated; then add the remainder of the sugar and stir and knead with the spoon until you can't anymore. (If your sugar is lumpy, you will need to sift it before adding it to the marshmallow mixture.) Pour mixture onto a clean work surface greased generously with Crisco. Also, make sure your hands are greased well to prevent the fondant from sticking to them. Knead the fondant dough until all sugar is incorporated, and the dough is smooth and elastic. This usually takes about 5-7 minutes. Use more Crisco as needed. When finished, store in airtight container or Ziplock bag until ready to roll out.

When you are ready to roll out the fondant, smooth out a generous amount of cornstarch onto your surface and your rolling pin. I use a piece of clear vinyl sheeting that I purchased from the fabric dept. and Wilton's large white fondant rolling pin. Even though I don't always use Wilton products, I find that this rolling pin works the best. Roll out about 1/8 inch thick, a little larger than your desired size. Roll back onto the rolling pin and then, starting at one edge of your cake, carefully unroll the fondant onto the cake, just as you would if you were putting pie crust on top of a pie. Do not fold the fondant. Make sure your cake is completely cool and covered with a generous layer of buttercream frosting prior to putting the fondant on the cake. Now, shape and smooth the fondant onto the cake with your hands. Dust any excess cornstarch off of the cake with a finely bristled brush. Once you are satisfied with your results, cut the excess fondant away from the bottom with a sharp knife or pizza cutter.