Showing posts with label whipped cream icing. Show all posts

Saturday, March 15, 2014

Update on Whipped Cream Icing

If you are a regular follower of my blog, you know my dilemmas of coming up with good ways to stabilize whipped cream to use for icing cakes. Well, once again I have changed my method. This time, I think it's a keeper because it not only tastes terrific, is readily available, and holds up well, but is also very cost effective... all using the real stuff. Yum. So here's the method... for every pint of heavy whipping cream, add 1 Tablespoon instant vanilla pudding, 1/3 cup powdered sugar, and vanilla to taste. Whip in chilled bowl until stiff peaks form. Voila... incredibly tasting whipped cream icing for your next cake.

I get the 1/2 gallon from Costco since I go through a lot of cream. I also use it in 
my buttercream icing. You can just use the inexpensive store brand for the pudding.

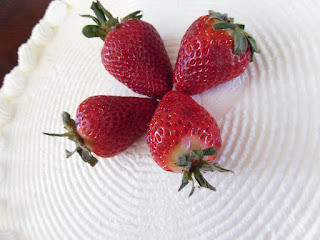
Look at this yummy fluffy whipped cream, perfect for icing this strawberry shortcake specialty cake... rich buttery yellow cake with 3 layers of whipped cream and fresh strawberries... gotta love it!


Friday, February 24, 2012

Fresh strawberries and 100% real whipped cream...yum!


Here's the cake I did today...strawberry shortcake...yellow cake with whipped cream and fresh strawberries. Strawberries still aren't wonderful this time of year, but I added a little sugar and they were fine. The 100 % real whipped cream with the powdered stabilizer tastes so much better than when I used to combine whipped cream with the non-dairy stuff. No comparison...love it! I think I put too many strawberries in because the cake was too tall to put the lid down on the box, but it was for a friend, so I wanted it to be extra special!


Monday, June 20, 2011

Chantilly Whipped Cream Stabilizer

Couldn't remember whether or not I put a post about this yet...apparently, I took pictures, but never wrote a post. Anyway, the dilemma of using whipped cream to ice cakes...especially wedding cakes. I have always used a non-dairy whipped topping base, along with the whipping cream...2 parts base to 1 part whipping cream. Over the years, I have used several different brands...Pastry Pride when we lived in AZ, Rich's whipped topping when I had a supplier here in the Springs, and then another brand that I purchased frozen from Cake Crafts in Denver. Never liked it quite as much because it tended to leave a funny aftertaste. So, after doing some research online, I found good reviews about a product called Chantilly Whipped Cream Stabilizer. It is in a powdered form that I add to 100% heavy whipping cream, along with a little powdered sugar and clear vanilla. Works like a charm, tastes great, icing smooths on really great, and the icing holds up well. No more funny aftertaste. A little pricey, but worth it to be able to just have it on the shelf and not have to keep it frozen. It is basically a gelatin-based product. Yes, I could probably cook up my own gelatin to add to whipping cream, but sometimes time is of the essence when decorating, and it's just nice to have a product I can just add to the cream and whip up. Yesterday, along with the wedding cake, I also had an order for a chocolate mint cake, with chocolate mint mousse filling, iced in chocolate whipped cream...so I added a small amount of cocoa powder, along with a bit more powdered sugar to sweeten, and it turned out great.


And the wedding cake...

Whipped cream and fresh flowers...a great combination

I love fresh flowers on wedding cakes. I also love purple on wedding cakes...it's a very bold, beautiful, and striking color. So I designed this wedding cake for a bride yesterday...the flowers were beautiful. Lilies were a bit large, so I had to put on a few more flowers than I believe she wanted to balance out the size, but overall, I think the finished product was quite stunning. The cake flavors were lemon with cream cheese and lemon fillings, fudge marble with Bavarian Creme filling, and yellow with whipped cream and fresh strawberries. Used the Chantilly whipped cream stabilizer to whip up the cream to ice the cake.


Tuesday, June 7, 2011

Cutting characters with Cricut Cake using Homemade Gumpaste

I recently acquired a recipe for homemade gumpaste which I have been really happy with. Not only is it far less expensive than the pre-made stuff you purchase in the store, I think it is much easier to work with...softer and more pliable. The first time I used it, I thought it might be too soft to used with my Cricut, but it worked like a dream. I will take you step by step through the process of cutting and assembling the pieces after giving you the recipe, so you can try it yourself. This recipe is courtesy of Carrie's Cakes. 


Homemade Gumpaste Recipe
(courtesy of Carrie's Cakes)

(2) pkgs unflavored gelatin (2 Tbsp)
1/2 cup cold water
1 tsp lemon juice

In small saucepan, add water and lemon juice. Sprinkle gelatin on top of water. Allow to soften until water is absorbed, about 5 minutes. Begin to heat gelatin gently. Stir until gelatin is a dissolved clear liquid. DO NOT ALLOW TO BOIL!  Turn off heat.

Add:

2-3 Tbsp. melted vegetable shortening
1/3 cup white corn syrup

Stir to combine thoroughly. Next place 2 lbs. powdered sugar (reserving about 1 cup) in a large mixer bowl. Add the gelatin/corn syrup liquid to the powdered sugar and mix well. Stop mixer, add 2 1/2 - 3 Tbsp. Tylose powder. Continue to mix until thoroughly combined and mixture thickens. Pour mixture onto lightly greased surface, which has been lightly dusted with powdered sugar. With lightly greased hands, knead until it forms a smooth rubbery ball. Add additional sugar if dough is too sticky or soft. Knead in as much sugar as necessary. Beginners usually make it too soft. Wrap tightly in plastic wrap twice. Store in gallon-sized ziploc bag. Allow to rest overnight. Can be stored @ room temperature for weeks. Refrigerate or freeze for extended storage time. This recipe works very well with the Cricut Cake electronic cutter.

Preparing and Cutting Gumpaste 

Roll out enough gumpaste for your cutting mat onto a silicone mat.
You know you have it thin enough when you can see the wording through the gumpaste. Roll it out a bit larger than your cutting mat.
I spread a light coat of high ratio shortening onto the Cricut cutting mat with a silicone pastry brush...you need enough so that your gumpaste with adhere without slipping or pulling up when cutting.
Peel off the gumpaste from your silicone mat and place carefully onto your cutting mat.
Gently use your rolling pin to roll onto your cutting mat, making sure that you get all of the air bubbles out.
Trim off excess gumpaste with pizza wheel, making sure that you trim off enough on the sides where the rollers will go.
Pull off excess gumpaste and save for next project.
This is what your cutting mat should look like after trimming.
This is the picture that I used to make my pattern.
Using my "Make the Cut" program (which is no longer available for use on the Cricut cutters), I layered the pieces on the virtual cutting mat on my computer before cutting them out.
Feeding the cutting mat into the Cricut...
Here is my Cricut cutting out the pieces...I usually use the medium speed.
This is what the pieces look like after being cut out.
I next airbrushed the pieces with my Fat Daddio airbrush, which I happen to love.
Here is my motorcycle guy after I have assembled all the pieces. The pieces stick together with just a tiny bit of water. I use a small paint brush to brush on the water.
Here is the finished cake. I was able to put the finished piece on a cake with whipped cream frosting, which I was never able to put a detailed pattern on before. 

Happy Cricut cutting!

Monday, April 18, 2011

USAFA Bridal Faire...

After some mis-communications and not being able to participate last year, I was able to have a booth at this year's Bridal Faire at the Air Force Academy. I prepared most of the week (amid a house full of visiting grandchildren), and then set up on Friday morning. The event took place on Saturday between 10 and 3. I felt that it was successful and got some good contacts and leads, both prospective brides and vendors that will hopefully refer me. I was able to experiment some more with SugarVeil, which seemed to be very interesting to several visitors. Overall, a successful and hopefully profitable day...

My friend Nancy and I at our booth, getting ready for the Bridal Faire to begin.
Background display for booth, set up day before
Display cake
Display cake with SugarVeil lace over chocolate fondant. Lace made in SugarVeil silicone mat

3 out of 6 of sample cakes to taste...
SugarVeil heart piped on greased parchment over printed design...placed on chocolate fondant.
Cake was fudge marble with Bavarian Creme.
Chocolate mint with chocolate mint mousse and vanilla fondant.
Strawberry shortcake...yellow cake with whipped cream and fresh strawberries. Tried new Chantilly whipped cream stabilizer which worked like a charm...whipped cream held up through entire show.

Sunday, February 13, 2011

Another successful cake tasting...

So yesterday I had another cake tasting day. I enjoy the one that I have each year just before Valentine's Day because I do extra things like Valentine Cookies and a strawberry topiary tree. I met some wonderful people that came and even secured a few orders. We share leftovers with friends and neighbors. Lots of work? Yes, but worth it in the end. Here are a few pictures...


 Valentine sugar cookies...dipped in fondant and decorated with buttercream
Two most popular flavors...
 Raspberry Fudge with chocolate buttercream
 Strawberry shortcake...yellow cake with whipped cream and 
fresh strawberries iced in whipped cream
Strawberry topiary tree...this is my small version...always a huge hit!

Saturday, January 2, 2010

Dark Chocolate Buttercream on Whipped Cream

I designed a cake this weekend with simple, yet elegant decorations done with dark chocolate (to look like black). I didn't know how it would hold up on the whipped cream icing, but it did just fine. It is always a trial to set up a cake iced in whipped cream, as the whipped cream tends to be very unforgiving. The icing goes on very smooth and looks wonderful, but if any repair work is needed after the cake has set for awhile, it is very hard to make it look good, and it is almost certain that some touch up work will be needed somewhere.  That's when flowers, etc. come in nicely. . . or you can also make certain the touched up part is at least not in the front of the cake. The flavor of this cake was dark chocolate mint with chocolate mint mousse filling.


Saturday, November 28, 2009

Chocolate Mint Mousse Wedding Cake

A visitor to my website requested some information about making a chocolate mint mousse cake for her daughter's wedding. First of all, she lives at a very high altitude, so it is necessary to make a few changes when baking the cake. For the chocolate mint cake, I use Duncan Hines Dark Chocolate and add 1 tsp. of mint flavoring to each cake mix. I also add 1/4 cup flour and an extra egg (4 total) to each mix. If I am using 2 mixes (I never mix more than 2 mixes at once), I add 7 eggs instead of 6. Also, be very careful not to put too much batter in the cake pans. Too much batter will also make the cakes sink in the middle. I used to always bake my cakes at 325 degrees instead of the recommended 350 degrees because the cakes turned out moister. At high altitudes, I have to raise the temperature slightly to 335 degrees. Just be careful not to overbake the cake. 


The layers of the cake are torted (split) and filled with a chocolate mint mousse. The recipe is as follows:
1 (8 oz.) package cream cheese
Approx. 1/3 cup cocoa powder
Approx. 1 1/2 cups powdered sugar
2-3 cups of whipped topping
Andes mint pieces


Beat cream cheese until soft and smooth. Scrape bowl and gradually add the cocoa and powdered sugar and beat until smooth and fluffy, scraping the bowl often. Fold in the whipped topping and mint pieces.
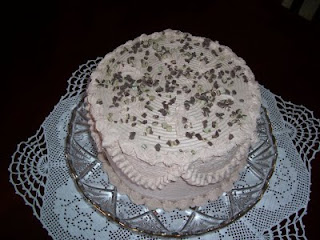
I would normally ice this cake in a chocolate whipped cream with Andes mint pieces sprinkled on top, but for a wedding cake, I would ice it in a regular whipped cream. One of my past entries will give you the best recipe for a stabilized whipped cream icing. It is important that the cake stays refrigerated after decorating it until just before setting it up. Here are two pictures...one shows the chocolate mint mousse cake, and the other shows a wedding cake iced in whipped cream.                                           

Chocolate Mint Mousse Specialty Cake

Wedding cake iced with whipped cream icing

Monday, September 28, 2009

Using whipped cream icing on cakes

I had a request for whipped cream icing on the last wedding cake I designed. The best whipped cream I have found to use on wedding cakes is a stabilized whipped cream made with Rich's whip topping base. You add 2 parts of the base to 1 part of heavy whipping cream and whip with the wire whisk attachment of your mixer on medium speed until soft peaks form. For this particular cake, I also added vanilla and some ivory color. This is a great tasting whipped cream, goes on smoothly, and holds its shape well. You can also add other liquids to this base for different flavors. I buy it by the quart size, and it comes frozen, but I believe you can get it in larger sizes also. The flavors for this cake were spice with cream cheese filling, chocolate with coconut pecan filling, and banana split (layers of whipped cream with bananas, pineapple, and strawberries, drizzled with chocolate syrup and sprinkled with nuts). The flowers were very simple, yet elegant, as was the design of the cake. I displayed the cake on a 22 inch round silver plateau, which I believe adds greatly to the presentation, making it a beautiful centerpiece. The wedding venue was the officer's club at Petersen Air Force Base.


Friday, February 22, 2008

Which icing do you prefer?

When considering icing for your wedding cake, you normally have three options:
  • Buttercream
  • Whipped Cream
  • Fondant

Cream cheese frosting is not really an option here, as it will not hold its shape well enough to decorate with.

Buttercream icing is my preferred choice. It holds up well in most temperatures, is easy to work with, especially when creating details, it tastes great, and is easy to cut and serve. It also tints well, with paste color, or airbrush.

Whipped cream icings can be made with a stabilized whipped cream or a non-dairy whipped topping. It is easy to spread on the cake, and makes for a smooth finish. Some customers like it better because it is not as sweet as the buttercream and has a lighter texture. It is difficult to do detail work with whipped cream icing; it should mainly be used for borders. It also needs to stay cool, so it should not be left for long periods without refrigeration. It too is easy to cut and serve, but does not always tint well.

Fondant is quickly becoming the icing of choice for wedding cakes. It gives that smooth porcelain finish that looks great in pictures and holds up well in most temperatures, but it does have several negatives. It is more difficult to work with; therefore it usually costs more. It can also be difficult to cut and serve. The traditional fondant tastes pretty nasty. I have found a fondant recipe, made with marshmallows, that is much easier to work with, tastes much better, and is a little easier to cut. The fondant is rolled out (like pie dough) and carefully placed over the cake which has been frosted with a generous layer of buttercream. So, if your guests still don't like the taste of this fondant, they can always peel it off and still have the delicious buttercream underneath. Fondant covered cakes should not be refrigerated if you want to keep their "perfect" finish.