Friday, January 1, 2010

Happy New Year!

I received an order for 5 dozen cupcakes for New Year's Eve day. I'm not a huge cupcake fan, but wanted to do something a little special for this order. First I went to my "Paint" program, and came up with a design that I thought would work,  then printed it out enough times to use as a pattern. 

Then I melted both dark and white chocolate and piped each of the designs. After the designs cooled and hardened, I brushed them with gold highlighter dust.


Since I wanted the frosting to be somewhat festive, I decided to stripe my decorating bag with liquid paste color, so that the icing would come out 2 tone. I iced the yellow cupcakes with blue and the chocolate with purple.

Here are the finished products...


Monday, December 21, 2009

The Smells and Tastes of the Season...

Ahhh, the smell of fresh baked cinnamon rolls, or the "yumminess" of decorated sugar cookies...what Santa could resist these cookies waiting for him as the jolly old man comes down the chimney? 
Cookies and hot cocoa for Santa

Best Sugar Cookie Recipe
Here is my sugar cookie recipe that I have used for many years. It is so yummy...soft and just sweet enough. They melt in your mouth. They are good just iced with buttercream frosting and sprinkled with cookie sprinkles, but when I want them to be really special, I dip them in fondant and then decorate them.   
3/4 cup butter, softened
1 cup granulated sugar
2 eggs
1 teaspoon vanilla
2 1/2 cups flour
1 teaspoon baking powder
1 teaspoon salt
Cream butter, sugar, eggs and vanilla until fluffy. Blend in flour, baking powder and salt. Cover and chill at least 1 hour. Heat oven to 400 degrees. Roll dough 1/4" thick on floured surface. Cut into shapes. Bake on parchment lined cookie sheet for 6-8 min. or until just set and barely brown on bottom. Do not overbake. Ice with fondant or buttercream icing if desired. Makes 2 1/2 - 3 doz. cookies. (You can even just use a can of store-bought icing and sprinkle with red and green sprinkles.)

Sugar cookies dipped in fondant and drying on rack
Cute snowman
Christmas tree and stocking

Saturday, November 28, 2009

Chocolate Mint Mousse Wedding Cake

A visitor to my website requested some information about making a chocolate mint mousse cake for her daughter's wedding. First of all, she lives at a very high altitude, so it is necessary to make a few changes when baking the cake. For the chocolate mint cake, I use Duncan Hines Dark Chocolate and add 1 tsp. of mint flavoring to each cake mix. I also add 1/4 cup flour and an extra egg (4 total) to each mix. If I am using 2 mixes (I never mix more than 2 mixes at once), I add 7 eggs instead of 6. Also, be very careful not to put too much batter in the cake pans. Too much batter will also make the cakes sink in the middle. I used to always bake my cakes at 325 degrees instead of the recommended 350 degrees because the cakes turned out moister. At high altitudes, I have to raise the temperature slightly to 335 degrees. Just be careful not to overbake the cake. 


The layers of the cake are torted (split) and filled with a chocolate mint mousse. The recipe is as follows:
1 (8 oz.) package cream cheese
Approx. 1/3 cup cocoa powder
Approx. 1 1/2 cups powdered sugar
2-3 cups of whipped topping
Andes mint pieces


Beat cream cheese until soft and smooth. Scrape bowl and gradually add the cocoa and powdered sugar and beat until smooth and fluffy, scraping the bowl often. Fold in the whipped topping and mint pieces.
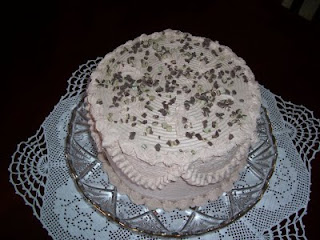
I would normally ice this cake in a chocolate whipped cream with Andes mint pieces sprinkled on top, but for a wedding cake, I would ice it in a regular whipped cream. One of my past entries will give you the best recipe for a stabilized whipped cream icing. It is important that the cake stays refrigerated after decorating it until just before setting it up. Here are two pictures...one shows the chocolate mint mousse cake, and the other shows a wedding cake iced in whipped cream.                                           

Chocolate Mint Mousse Specialty Cake

Wedding cake iced with whipped cream icing

Friday, October 23, 2009

Tips on working with chocolate ganache


  1. Make sure your ganache is the proper consistency. Do not add too much cream.
  2. Your buttercream icing underneath should also be the proper consistency. The trick is to make the icing spread smoothly, but don't make it too soft, or it will melt.
  3. Do not let the cream boil before adding your chocolate...it should be steamy, but not boiling. After adding your chocolate, keep stirring until smooth.
  4. If your ganache is too warm, let it cool slightly before pouring it onto your cake.
  5. Position your buttercream iced cake (that you have placed on a cake board that is the same size as the cake) on a cooling rack on top of a cookie sheet or bun pan, and then pour on the ganache and let it drip down to cover the sides. When it has set up slightly, move the cake to your platter or dish or cake board that you will be serving it on. The excess ganache should remain under the cooling rack on the cookie sheet, and should be starting to setting up. You can scrape it up and add it to any leftover ganache and use it for decorating. 
  6. Now you can add a bottom border and whatever other decorations that you choose. Remember, you can let the ganache set up a bit longer and then use it to make perfect chocolate roses. 

Thursday, October 22, 2009

Icing Under Ganache

Tuesday was my daughter, Paula's 26th birthday, and so she invited a few friends over for cake and ice cream. The cake she requested was vanilla with chocolate mousse filling, covered with a dark chocolate ganache. I filled the cake with two layers of the chocolate mousse and put a layer of rich chocolate buttercream in the middle. I also iced the cake with the chocolate buttercream, which made the chocolate ganache go on much smoother. The cake was just what Paula ordered, and was a hit with her friends. Happy Birthday, Paula!


Sunday, October 11, 2009

Using new silicone fondant mat


My new fondant mat arrived just in time for me to use to decorate my wedding cake for this weekend. It worked like a charm...just as I had hoped. I applied a very thin coat of Crisco before rolling out the fondant and it worked perfectly. No more sticking fondant or cornstarch all over my kitchen.


It was so fun to deliver this cake and see that the scroll work matched the design on the tablecloth overlays and the color of the roses matched almost perfectly to the color of the other silk roses they had used in the decorations. I was very pleased with the results. I also delivered 3 specialty cakes along with the wedding cake...Shirley Temple cake, but used white chocolate shavings instead of curls for easier cutting, Luscious Lemon, and Chocolate Mint Mousse. The flavors of the wedding cake were chocolate mint with chocolate mint mousse filling, and yellow with cream cheese and fresh strawberries. The flowers were done in royal icing, and the red was airbrushed on, leaving the bottom of the roses white, so as not to bleed on the white cake.


Thursday, October 8, 2009

New website!!


I am excited to announce that my new website went live today! I put the new site together myself, with a little tweaking from my son, Brent. I'm pleased with the way it turned out, and hope that you will enjoy browsing through it. If you have any comments, I would be happy to hear from you.