Thursday, September 23, 2010

Two flags, two emblems...different materials

Last time I did my Air Force flag cake, it was before I was introduced to the amazing capabilities of SugarVeil . The first flag was made from fondant...looked nice, but was very heavy and hard to place on the cake. I needed to add extra support in the cake so the flag would not crush it. This time, the flag was made from SugarVeil and no extra support was needed. The flag resembled even more closely an actual fabric flag, complete with weight and texture. The colors were also more vivid. The only thing I would have done differently were the stars. I cut them out of gumpaste...they looked great, but had a difficult time sticking to the SugarVeil material. I will be looking for a star punch to cut the stars out of the SugarVeil next time. I'm still having a difficult time using SugarVeil in my Cricut Cake. The SugarVeil pieces just adhered to each other without much problem. I didn't even need to use water. And the flag draped very nicely on the cake...just like an actual fabric flag. 


I used to make all of my Air Force emblems out of royal icing...looked OK, but now even more exact when cut from gumpaste with the Cricut Cake. In the pictures, you can see the differences.


How Awesome Is This!

When I got my new Cricut Cake machine, what I was really hoping to accomplish is to cut out some of my own patterns. Well, now I can do that...I purchased Make the Cut software which lets you cut out anything you want. You just import any pictures from your computer onto a virtual cutting mat, plug your computer into the Cricut Cake with a USB printer cable, and let the machine do the rest. It is truly amazing! Instead of creating my Air Force emblems from royal icing, I can now cut all the pieces out of gumpaste with the Cricut, airbrush them, and stick the pieces together with a little water. It still takes some time, but the design is so much more exact. I'm still experimenting with what food materials I can cut well...so far gumpaste is the best.

Gumpaste pieces layered and cut out
More pieces...
Look at how detailed some of the pieces are...

It's amazing how well it cuts out the tiny letters
Completed seal after airbrushing
and wing emblems...
Finished product with SugarVeil flag...chocolate with chocolate mousse and vanilla with raspberry mousse
Carrot cake with cream cheese frosting
Chocolate cake with fudge filling

Monday, August 23, 2010

Mini wedding cake for special couple...


Our friends, Sheila and Kim Cope were celebrating their 35th anniversary today. When they got married, Sheila flew out to Germany to meet Kim without any family. They first got married in Germany, which was required by the German government, and then were sealed in the Swiss LDS temple the following day. They never had much of a reception, and definitely no wedding cake. So, when I heard their story, I felt that they needed a wedding cake, even though small, for their 35th. So here is the cake, along with a picture of the cute couple. Sheila's favorite color is red, and since I don't like to use red icing decorations on my wedding cakes, I added red ribbon and fresh red roses from my garden. Happy Anniversary, Sheila and Kim! May you have many more.


Cake Top Ornaments

What you decide to put on the top of your wedding cake can make a huge difference in the finished look.  The thing that you need to ask yourself when deciding on a cake topper is "Will this distract or complete the look of the rest of the cake?" Even though an ornament may be "cute," you don't want it to distract from the cake. If you are sold on using something cutesy, you may want to consider just putting it on the table and use something like fresh flowers or a monogram or simple pick on the top. I really like the look of the monograms and there are lots out there to choose from now...research them on the internet. If you do decide to use a figurine of some sort, make sure it is not too large for the cake, and make sure it is something simple and elegant. If you think fresh flowers will complete the look of the cake, go with that option. 

Here are a few examples of good and not so good choices...

First, examples of appropriate fresh flower arrangements on top of cakes. Just make sure the flower size is appropriate for the size of the cake. Sometimes, even a simple floral spray can be elegant.


Here are some examples of monograms and picks...

I love the way the jeweled monogram sparkes

The floral arrangement is a bit large for the first cake, but the heart pick added with the flowers was a nice touch

Examples of some simple figurines...

Simple and appropriate size

Cinderella and Prince Charming...appropriate for theme of cake along with glass slipper on largest tier. Also, notice how the square mirror under the figurine coordinates with the cake shapes

Examples of inappropriate cake toppers...

Figurine simple and nice, but a bit too large for this cake

Definitely inappropriate...distracts from overall look of the cake...simply more pansies or a pick would have completed the look

Flowers too large for cake, also not enough color contrast...a simple fondant bow or pick would have been ideal

In this cake, the bride decided to put the ornament under the cake and have fresh flowers on top...perfect for this design...


Sunday, August 22, 2010

Silicone Fondant Molds

Sometimes I get excited over simple little things. One decorating tool that I really LOVE is my blue silicone fondant bead mold. There are lots of these silicone fondant molds, but I really love this bead mold. I used it for the first time on the cake I did yesterday, and it was so simple to use and the results were even greater than I expected. So much easier to put on a fondant covered cake than to try to pipe a perfect bead border in buttercream at the reception site after the cake is stacked. 

Here are a few hints when working with the silicone molds...

  • Use half fondant and half gumpaste...work together thoroughly until smooth and pliable
  • Roll the fondant/gumpaste mixture into a rope the length you need, then push it into the mold
  • Trim the excess off with a small spatula
  • Put in the freezer for approx. 3-5 minutes before unmolding
  • Unmold onto a non stick surface and store in ziplock bag until ready to use
  • Attach to fondant covered cake with a small amount of water...apply with a small paint brush around entire border area


New Toys...

Yes, cake decorators get excited about new toys too...they are just different than what the average person may get excited about. My newest toy is my new Cricut Cake machine. For those of you familiar with the scrapbooking Cricut machines, this is the same except you use it to cut food products with. Instead of using a self-adhesive cutting mat like you would use with paper products, you use shortening to adhere your material to the mat. I'm still learning how to use it...experimenting with different materials and settings to get the results I want. I get a little frustrated sometimes when I can't get it to cut the way I want, but that's usually when I'm working on only a couple of hours or so of sleep after doing a wedding cake the night before. I've only had the machine for a couple of weeks...so far the things that I've been able to cut really well are Cricut frosting sheets, gumpaste, chocolate fondant with Tylose (if I can get it to the proper consistency after freezing it), and cheese slices...yes, cheddar cheese slices. It's really too bad that I can't decorate cakes with cheese, because that actually worked out better than anything thus far...unfortunately most customers don't want cheese on their cakes. I've done quite a bit of on-line research to see what seems to work. I ordered one product called Sugarveil that I will be experimenting with this week. If I can get it to work like I want, I will be posting the results with the instructions...a somewhat lengthy process, but worth the time if I can get it to work. 

I have decorated two cakes so far using the Cricut Cake...the first with gumpaste and the second with the frosting sheets. I've been pretty happy with both results, but don't care much for the taste of the frosting sheets...and they are very pricey, so hope to use other products.
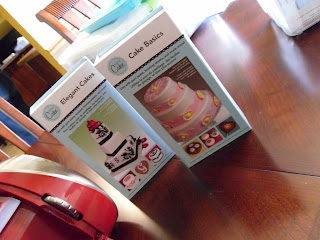
I am persistent, so I will keep working until I get the desired results, and then share my knowledge on my blog.

Outside of Cricut Cake...pretty red
Inside...all completely food safe
Two cartridges that I have used so far...any of the Cricut cartridges work on the Cricut Cake.
Wedding cake using gumpaste scroll cutouts
Closeup of scroll work
Mini wedding cake using frosting sheet cutouts
Closeup of heart design

Sunday, August 8, 2010

Two weddings...one tiny and one big!

Yesterday I delivered two wedding cakes. One was for a very small intimate wedding. I designed an 8 inch round cake for a couple from Austin, TX that were coming to the Springs to get married. They wanted a cake just for them and their kids. So anyway, the flavor was German chocolate with two layers of coconut pecan filling and one layer of fudge filling, all covered in a white chocolate ganache. This is the first time that I have made a white chocolate ganache. I really like the way it turned out...set up well, but didn't get too hard, so it was easy to cut, and tasted great! Just added a little ribbon and fresh flowers. I delivered the cake to the Pineview Grille at the Colorado Country Club.


The other cake I designed was delivered to the Falcon Officer's Club at the AF Academy. It was a very large cake...8, 12, and 16 inch square tiers...all done in black and white with a beautiful fresh floral cake top  in hot pink roses. I was very happy with the finished product, and so was my customer. The cake was done in 3 flavors...fudge marble with bavarian cream, yellow with strawberry mousse, and chocolate with raspberry and fudge. Again, the black portions were all done with Hershey's special dark chocolate fondant. The people at the Falcon Club were so wonderful to work with. When I got there, they let us use one of their carts, and helped to roll the cake in. The cake table was loaded with plates and a white table linen (two of my pet peeves...see older post), but they were so kind as to get another small table to put the plates on, and also put a black tablecloth overlay on top of the white linen. I also set this cake up on my new 22 inch square silver cake plateau...it made the cake look even prettier.