Showing posts with label decorated sugar cookies. Show all posts

Sunday, April 19, 2015

Whistle While You Work...or Zing goes the strings of my heart...


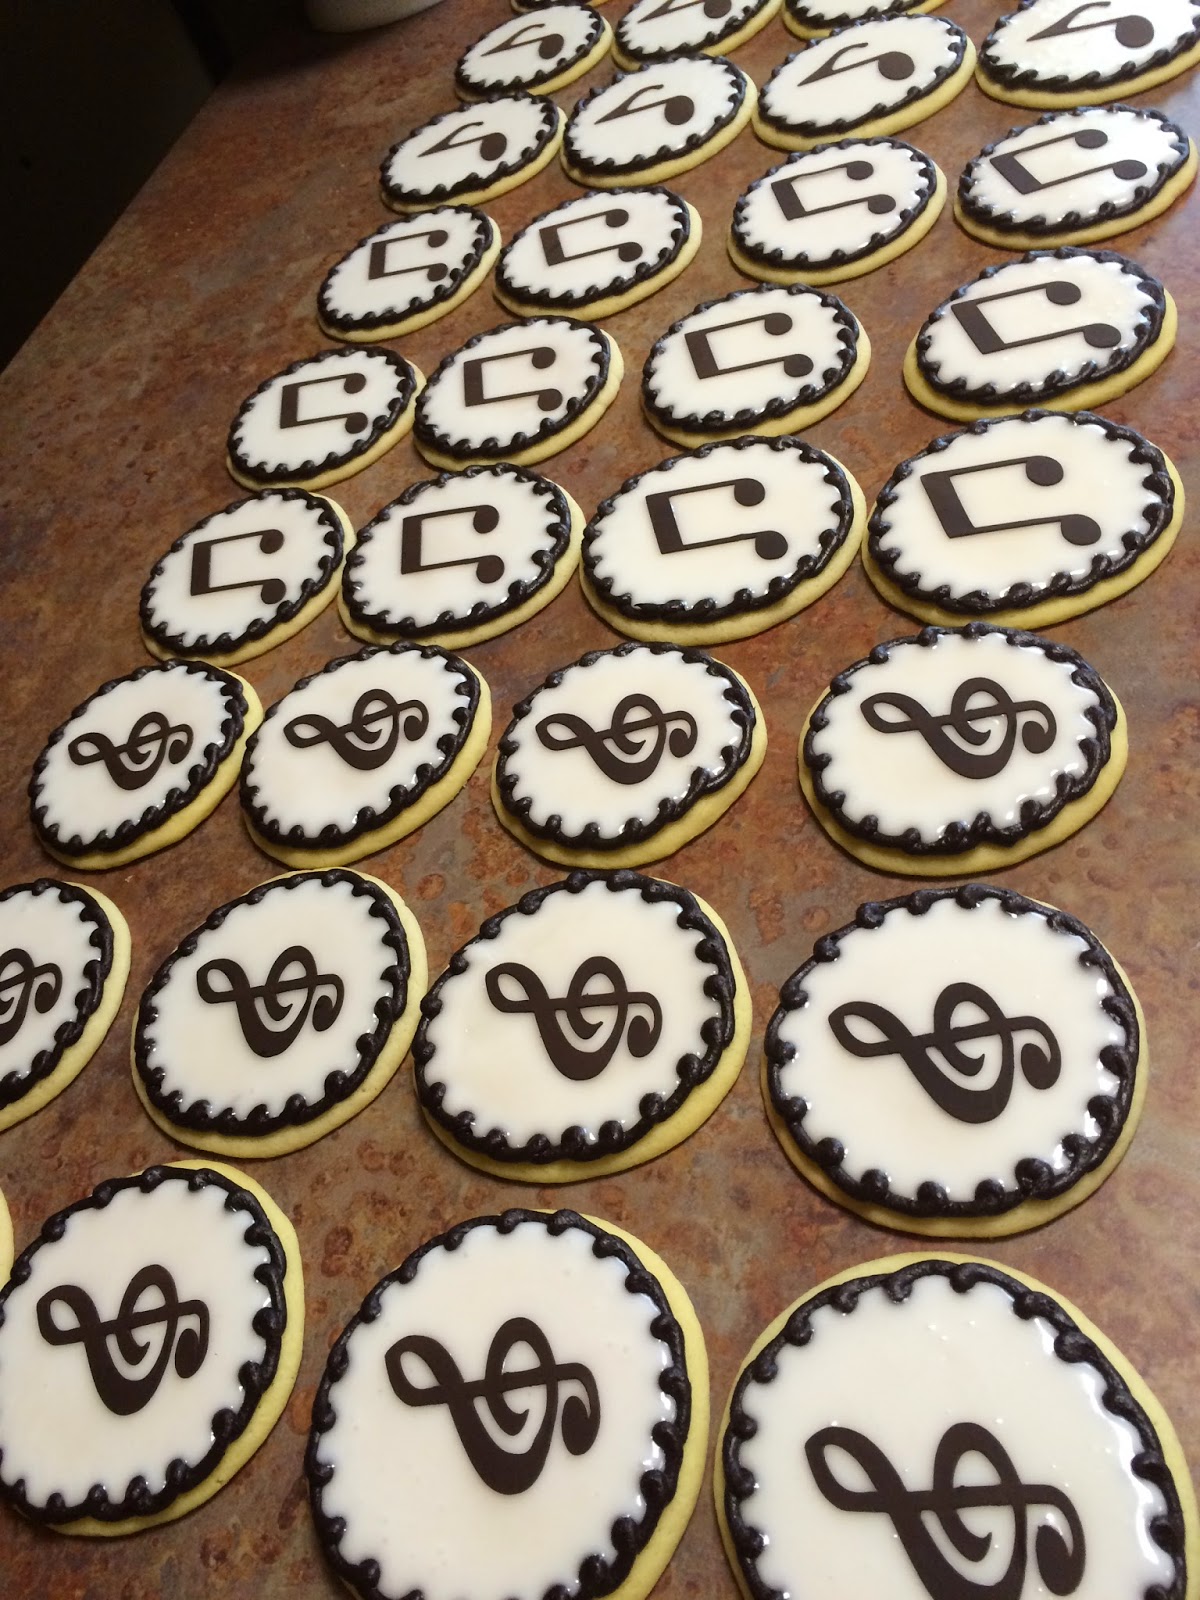
Either way, I almost felt like singing while I was decorating these cookies. These are my yummy 4 inch sugar cookies with poured fondant and musical decorations cut out with my Zing electronic cutter. For these cookies, I piped a dark chocolate border and then filled them in with poured fondant. Then, I simply placed the musical notes and treble clefs that I had cut out the day before on each cookie. For those of you that regularly follow my blog, you know that I very seldom use black in my decorating, but instead use Hershey's Special dark cocoa, or Satin Ice dark chocolate fondant. Both taste soooo yummy, and pretty darn close to being black without the nasty taste. For the sugar cookie and fondant recipes, click here

It just works easier if you put your fondant in a squeeze bottle to fill in the cookie tops, so a while back when I was at Sam's, I bought these cool large squeeze bottles with a much larger opening and they work so much better than the old small ones I had. A little over 2 bottles full did all 3 dozen cookies! The trick is to keep the fondant warm, so when it begins to cool off, just stick your bottle in the microwave for about 20 sec. or so, and you're good to go. 
Decorations cut out with Zing electronic cutter... I LOVE my ZING!

Comparison of the 2 different sizes of squeeze bottles.
Cookies after borders are piped.  
  
             Use squeeze bottle to fill inside the piping.

Use toothpick to coax fondant into the right areas.

Cookies covered with fondant.
Place decorations on fondant. If fondant has set, you can use just a bit of edible glue to attach the pieces.
 Finished cookies


Friday, October 31, 2014

Sugar Cookies... yummmmm!

Since I had so much response to my FB post about Halloween sugar cookies, I decided to repost my recipe for sugar cookies and poured fondant. My cookies usually just have simple decorations. I don't get really fancy like the "cookie decorators" out there, but these are oh sooo good. The trick to making really yummy sugar cookies is to not roll them out too thin, and do not overbake them (or any kind of cookie). I like my cookies soft, so they almost melt in your mouth. Another thing to assure wonderfully tasting cookies is to always use real butter. Nothing else will do but the real stuff here.

BEST SUGAR COOKIE RECIPE

Here is my sugar cookie recipe that I have used for many years. It is so yummy...soft and just sweet enough. They melt in your mouth. They are good just iced with buttercream frosting and sprinkled with cookie sprinkles, but when I want them to be really special, I dip them in fondant and then decorate them.  

3/4 cup butter, softened
1 cup granulated sugar
2 eggs
1 teaspoon vanilla
2 1/2 cups flour
1 teaspoon baking powder
1 teaspoon salt

Cream butter, sugar, eggs and vanilla until fluffy. Blend in flour, baking powder and salt. Cover and chill at least 1 hour. Heat oven to 400 degrees. Roll dough 1/4" thick on floured surface. Cut into shapes. Bake on parchment lined cookie sheet for 6-8 min. or until just set and barely brown on bottom. Do not overbake. Cool completely on rack. Ice with fondant or buttercream icing if desired. Makes 2 1/2 - 3 doz. cookies. 

Poured Fondant

This will be a bit difficult, because I never measure my ingredients for my poured fondant, so make sure you experiment on your family first to get the proper consistency.

Powdered sugar

Corn syrup
Flavoring (I usually just use vanilla or butter vanilla)
Warm water

I make the fondant in my KitchenAid mixer, but you can even mix this up by hand, as long as you take time to get all the sugar lumps out. Add powdered sugar to the bowl. How much will depend on how many cookies you have to dip. I normally fill my bowl approximately half way. Add about 1/3 to 1/2 cup of light corn syrup and desired amount of flavoring. Then, add warm tap water, a little at a time until your fondant is thin enough for dipping, but not so thin that you can see through it. Mix with flat beater on low speed until smooth. You do not want to add air bubbles to the fondant. With a little practice, you will know when you have the proper consistency. Now, put a cooling rack over a cookie sheet. As you dip the cookies, let the excess drip off, then using your finger, scrape off the edge of the cookie, and put on the cooling rack to allow to drip off any more excess fondant and set. Before the fondant sets, you can add sprinkles if desired, or make designs with colored fondant.


An alternative to dipping the cookies is to pipe a string border from buttercream with a #3 or #4 writing tip and then fill in with the fondant, using a toothpick to coax the fondant around the edges. I use a squeeze bottle filled with the fondant to fill in the top of the cookies. This gives your cookies a cleaner edge. These cookies never harden as much as cookies decorated with royal icing, but they do set up to the touch, and if you leave them set out for about a day (if they last that long) they will be slightly harder. 


Update to original post: I forgot to mention that I never use black food coloring unless absolutely necessary. All of the "black" that you see in my decorating is made with Hershey's Special Dark Cocoa. Just keep adding enough cocoa until your icing looks black. Sure tastes better than that nasty black food coloring.


Monday, October 15, 2012

Sugar 'N Spice and Snips and Snails and puppy dog tails...

This customer was celebrating her twins first birthday, and was decorating using the poem words "sugar and spice and everything nice" and "snips and snails and puppy dog tails." The final products... puppy cupcakes, princess and cupcake cookies, and 2 smash cakes to match. Fondant cut out with cookies cutters, and the "cherry" on the cupcake was fruit leather. Tastes much better than red icing.


More recycled yellow buttercream...

An update to the earlier post about the yellow buttercream... here are two more orders that I was able to use it for...

Here you see the yellow and I added some orange color to the yellow to make the orange icing
I added orange color to make the orange buttercream to outline the cookies and added green to make the stems and leaves.

There is very little yellow icing left at this point. I think I learned my lesson.

Monday, June 20, 2011

Father's Day and Cookies...

I have friends who happen to love my sugar cookies. Here's a cute idea. Sheila ordered 2 dozen sugar cookies for her husband, so we put on them the names that he goes by. Happy Father's Day, Kim...hope you enjoy the cookies!


Saturday, May 14, 2011

Yum...sugar cookies for baby shower!!


Who needs a cake for a baby shower, when you can have yummy sugar cookies...or even better, do both, and get a sugar high. Anyway, as you can see, I had some more fun with my Cricut Cake, cutting out simple baby designs and then embellishing them a little with buttercream frosting. I've had friends ask me for my sugar cookie and icing recipes, so I will share those here. For my sugar cookie recipe, click here. The secret to making the cookie dough is to beat the wet ingredients until light and fluffy, and then mix in the dry ingredients until just incorporated, being careful not to mix more than necessary. This will keep your cookies nice and tender. Roll your cookies out on a floured surface, being careful not to roll out too thin. Transfer them onto your baking sheet and then lightly brush the excess flour off with a small paint brush. If your cookies are small, bake them only for the minimum amount of time, 6 minutes. The cookies that you see in the pictures here are 4 inch cookies, and I bake them for 7 minutes. They will not look  brown at all when you take them out of the oven. I let them rest on the cookie sheet for a few minutes while I bake the next batch, and then take them off to let cool on a wire rack. As soon as they are cool (only a few minutes), you can stack them to save room on your cooling rack. When they are completely cool, you can dip small cookies in fondant, or pour and smooth on for the larger cookies. Once the fondant is set, you can decorate with buttercream frosting. My oldest son still enjoys Mom's sugar cookies, even though he is 33 yrs. old. So, even though I can't send him fancy decorated cookies, I usually make heart shaped cookies for Valentine's Day, just spread my buttercream icing on them, and add a few sprinkles. Then I wrap them individually and pack them well in a box with styrofoam peanuts. Below is my poured fondant recipe, as well as my tweaked buttercream icing recipe.


Poured Fondant
This will be a bit difficult, because I never measure my ingredients for my poured fondant, so make sure you experiment on your family first to get the proper consistency.


Powdered sugar
Corn syrup
Flavoring (I usually just use vanilla or butter vanilla)
Warm water


I make the fondant in my KitchenAid mixer, but you can even mix this up by hand, as long as you take time to get all the sugar lumps out. Add powdered sugar to bowl. How much will depend on how many cookies you have to dip. I normally fill my bowl approximately half way. Add about 1/3 to 1/2 cup of light corn syrup and desired amount of flavoring. Then, add warm tap water, a little at a time until your fondant is thin enough for dipping, but not so thin that you can see through it. Mix with flat beater on low speed until smooth. You do not want to add air bubbles to the fondant. With a little practice, you will know when you have the proper consistency. Now, put a cooling rack over a cookie sheet. As you dip the cookies, let the excess drip off, then using your finger, scrape off the edge of the cookie, and put on the cooling rack to allow to drip off any more excess fondant and set. Before the fondant sets, you can add sprinkles if desired, or make designs with colored fondant


Tweaked Buttercream Icing Recipe
This recipe makes enough to ice and decorate a 1/4 sheet or 2 layer 8 inch round cake. When I make this recipe, I usually double the amount. It will stay good in the refrigerator for a couple of weeks or so. Just soften it up for a few seconds in the microwave and stir before using.


1 cup Crisco
1/2 cup salted butter (1 cube)
Flavoring to taste (I use butter vanilla)
1/4 -3/8 tsp. salt
6 cups sifted powdered sugar (or about 5 1/2 cups unsifted)
1/2 cup heavy whipping cream


You need to use a heavy mixer like a KitchenAid, or something similar, to make this icing. The tweaking I have done to this recipe is not with the ingredients, but with the way I mix it. First, beat the Crisco, butter, salt, and flavoring together on medium speed with the flat beater for several minutes until very light and fluffy. At this point, it will almost look like the finished icing. Then add 1/3 of the sugar and 1/3 of the cream and mix on low until combined. Scrape the bowl and add another 1/3 of each and mix again. Finally, scrape the bowl again, and add the last of the sugar and cream and beat on low until thoroughly combined, being careful to not add extra air into the mixture. The icing should be very smooth and fluffy. The reason for using Crisco is because it holds up better for decorating purposes. If you choose to use all butter, lower the amount of salt to 1/8 tsp. To color the icing, I recommend using liquid paste colors. Also, I drape a kitchen towel around my bowl to help keep some of the sugar dust from flying all over.


Chocolate Buttercream
1 1/2 cups butter (3 cubes)
1/8 tsp. salt
Vanilla to taste
1/2 - 2/3 cup cocoa 
6 cups sifted powdered sugar (5 1/2 unsifted)
5/8-3/4 cup heavy whipping cream
2 Tbsp. light corn syrup


Mix as directed above, adding cocoa powder in with the first addition. Adjust the amount of cocoa powder depending on the richness of the chocolate you desire.


Thursday, March 17, 2011

More Cricut cookies...

Today is St. Patrick's Day...a great day for making cookies. I used my Cricut Cake to make cute shamrocks and little leprechaun hats, using my MTC (Make the Cut) software. Here is what the patterns look like on my computer screen... 


Next you put the gumpaste, rolled out onto the cutting mat, into the Cricut, press the cut button, and I end up with these cute cookies...


So much fun!

Sunday, December 19, 2010

Having way too much fun with my Cricut Cake...

Making holiday sugar cookies was never so much fun. Take a look at these cookies...yummy and very festive...all done with my Cricut Cake. My favorite is Mr. Santa Claus.


Merry Christmas to everyone!

Friday, November 5, 2010

Yummy sugar cookies in honor of election day...

We had a friend whose birthday just happened to fall on election day...so this is what I came up with...the big one for him and the others for some other friends.  Soft and yummy sugar cookies...these are the best...just eat them with a glass of milk or cup of hot chocolate.


The trick to making soft sugar cookies is not rolling them too thin, and not baking them too long.  All cookies should be taken out of the oven when just set, and let finish baking on the cookie sheet.