Showing posts with label wedding cakes. Show all posts

Monday, February 3, 2020

Introducing APRON BUDDIES!!!

For those of you who have been following our mission adventures at Cove Fort, Utah, you know that we are now back home in Colorado trying to adjust to post-mission life. While on our mission, I had a lot of time to ponder about what I wanted to do with my cake business once we got home. One thing I definitely decided was that I had to spend less time doing huge extravagant party cakes, and more time doing what I enjoy-teaching. So I have decided to change up my business a bit, and add a new dimension at the same time. For my Custom Creations business, I will continue to design wedding cakes, dessert cakes, cupcakes, and cake pops. I will leave the  party cakes to the younger and more energetic bakers. 

The teaching side of my business will be known as  Apron Buddies. I will be passing on my skills as I teach decorating classes and offer cake decorating parties. I may even throw in a dinner roll/cinnamon roll or other baking class from time to time. I hope my past customers and friends can feel my excitement and enthusiasm that I have for this new venture, and help spread the word! 


Our son, Tom, has designed the new Apron Buddies logo, and I will continue to use our Custom Creations logo for our cake designs. 


Thank you all for your past support, and I look forward to fulfilling your cake cravings again.  We are open for business!


Monday, November 20, 2017

Wedding cake ... really?

Every now and then, I will get a request for a very unconventional wedding cake. This cake request was from Kayli and Nathan from Denver. Their wedding was on a Sunday, so since I don't work or deliver on Sundays, Kayli came with 3 of her bridesmaids to pick up the cake. Kayli and Nathan met with me several months ago, and described what they had in mind, and I had cake samples for them to taste. I then had my son, Tom (Disney animator), draw a sketch for me to get a rough idea of what I could design for the cake. The request was a bolder or mountainside with grassy patches and a hammock on top, with the bride and groom. Also, they wanted some succulents on the cake because they really like them. So, here are a few pictures to show the progress of the cake.

 Rough sketch for cake idea.
 Stacked and filled 12, 10, and 8 inch layer cakes with support dowels. In the freezer to chill.
 Carved and shaped cake with crumb coat. Back in freezer to chill.
Final coat of buttercream, and back in freezer to chill before adding modeling chocolate.
 Finished cake. I used crushed edible rocks for the gravel on the trail, and touched up color with petal dust mixed with Everclear.
 Trees and figurines were molded from modeling chocolate, with the bride's dress  and hammock from Flexfrost, edible icing sheets.

Succulents were made from gumpaste. 

It's always a challenge and takes longer than anticipated to do a new design. But the bride and groom were happy with the results, so I'm good with that. 

Tuesday, October 29, 2013

Wedding cake or party cake?

So, if you are a big superhero fan, why not have a superhero party for your wedding reception? That's exactly what this bride and groom did, and the wedding cake reflected the rest of the decorations. Here is the cake with logos from their 4 favorite superheros... Deadpool, Green Lantern, Captain America, and Batman. The logos and side decorations were all cut out with my Cricut Cake. The most time consuming part, other than coloring and assembling the pieces, was putting all of the little windows around the four sides of the 14 inch square Batman tier. The top and bottom tiers were covered with dark chocolate fondant. I must say that this was the most unique wedding cake I have ever designed. 


Saturday, June 1, 2013

Lessons I should have learned from the Bible about feeding the multitudes...

Remember the incident in the New Testament when Jesus was preaching to the multitudes, and did not want to send them away hungry? So he gathered a few loaves of bread and a couple of fish, blessed it, and proceeded to feed thousands. When the multitude had finished eating, they gathered the remnants and several baskets were left. 

I swear that this is what happens when I serve beans and rice at a taco bar. I do not claim to be a prophet, by any means, but beans and rice just seem to multiply whenever I serve them. For example, last night we did a taco bar for 230 guests, so I made enough beans and rice for approximately 150 guests, knowing that not everyone would eat them. I think we had 200 servings left! So I have decided that from now on, no matter how many guests I'm serving, I will only make 1  recipe of beans and rice. If doing a a taco bar for 50, I will only do 1/2 recipe. Do people just not eat beans and rice? I don't know, but I do know that I left allot of beans and rice for the family to take home. Same theory goes for lettuce, tomatoes, and taco shells.

 Taco bar for "big fat Mexican wedding"

The cake I made last night was enough to serve 240...it was HUGE! No way was I going to serve regular size pieces. So I cut the pieces at least double of what I usually do, and many guests asked for a piece of each, which I gladly agreed to. There was still cake left over. The cake was all iced in buttercream. Two of the tiers were covered with icing "roses" and the other two tiers were covered with ruffles, made with 1/2 fondant and 1/2 white modeling chocolate. 

Cake flavors...Swiss chocolate with raspberry mousse and
 lemon with cream cheese and strawberry

Sunday, March 17, 2013

Traveling out of state with a wedding cake...

So, you may have seen the Cake Boss deliver completed cakes across the country, but as for me, I wouldn't dare try to do that. I just returned home from a trip to Utah where I delivered and decorated a cake for Heather and Matt. Heather is my husband's second cousin, and I told her a couple of years ago that I would make her wedding cake when she got married. Since we were driving, I knew I would be able to bake the cake at home, transport the cake in the pans, and then decorate it after I got there. I had done this same thing several years ago when my son Tom got married in Utah, so I knew I was good to go. Here was my last week's schedule...
Tuesday- Made buttercream icing and fillings; assembled tools, cake boards, etc.
Wednesday- Baked cakes, cooled, and covered with plastic wrap; measured out fondant, packed equipment and cakes. Left at 4:30 pm for Utah. 
Thursday- Arrived in Orem, Utah early morning after a few rest stops along the way. Two hour nap and visited with relatives, then off to the church kitchen to decorate the cake. Finished around 8 pm. 
Friday- Attended wedding at Mt. Timpanogos LDS Temple at 2 pm; after pictures, went back to church to assemble cake and arrange flowers on cake. Reception from 6-8 pm. Cut the cake for guests, and cleaned up afterwards. Got to bed about 10 pm. 
Saturday- Left to come back home about 9:30 am, drove all day and got back home to Colorado Springs a little before 8 pm. 

A quick trip, but glad we were able to go to the wedding, and that I was able to help out by making the cake. It's just a good thing I don't do this very often.


Saturday, October 13, 2012

Never on Sunday...

Today I delivered a cake for a wedding a day early. That's right... the wedding isn't until tomorrow. I told this customer that I didn't work on Sunday, but that didn't seem to matter. So, out we went to the Pinecrest, but this time to the Pinecrest Lodge, where the family was staying. I assembled the cake, took some pictures, then took it off the plateau, and put it in the refrigerator, due to the buttercream frosting and mousse and cream cheese fillings. They will need to transport it across the street to the event center... hopefully very carefully and without any mishap. A side note... there was another wedding reception about to begin in the event center, and my friend Shelley decorated the cake for that one. 


Sunday, September 30, 2012

Scrolls...2 wedding cakes, 2 different icings, 2 different kinds of scrollwork, and 2 different kinds of roses...

The design of the week for this week's wedding cakes was scrolls... 2 wedding cakes, both with scrollwork, but completely different.

Cake #1...

Buttercream icing
Piped scrolls
Fresh flowers


Cake #2

Fondant
Fondant/gumpaste scrolls cut from Cricut Cake
Gumpaste flowers


Sunday, August 12, 2012

Lots and Lots of Ruffles...

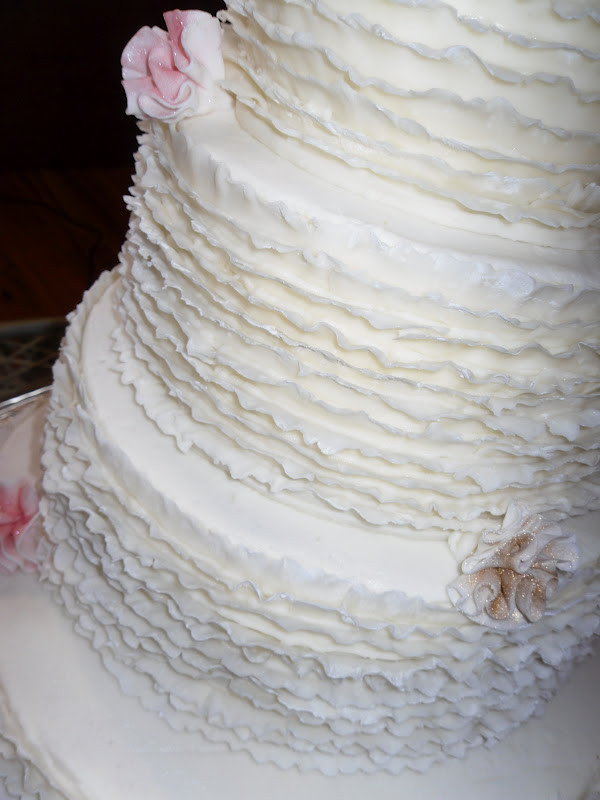
Today I designed a 4 tier wedding cake all done in ruffles... even the flowers were "ruffly." When I got this order, I had never done a cake like this, and so I went online to see if I could find out how to make the ruffles, and instead I found an entire tutorial on how to make a ruffle cake, and another tutorial on making the flowers that the bride wanted... yeah for technology!

Each tier on this cake was a different flavor...
  • Yellow with cream cheese and fresh strawberries
  • Lemon with lemon curd and cream cheese
  • Swiss chocolate with raspberry mousse
  • Vanilla with raspberry and cream cheese
All tiers were covered with buttercream icing, and then covered in ruffles made from 50/50 modeling chocolate and fondant. The dough was rolled out thin and cut into 3/4 inch strips and ruffled with a wooden dowel dipped in cornstarch. The end result was just what the bride ordered. Not too difficult, just time consuming. The first tiers took quite awhile, but I got faster as I went along. If you want a cake that's a little different and impressive, give this one a try.


Monday, January 2, 2012

Free Cake Tasting Scheduled for Saturday, February 11, 2012

Just in time for Valentine's Day...one of my free cake tasting days! If you are a prospective bride, call me to schedule a time to sample several of my most popular cake flavors. Also, compare different icings...buttercream, whipped cream, and fondants. If you haven't decided on the style of cake you want yet, you can view my portfolio to get some ideas. And because it's close to Valentine's Day, I usually have at least a couple of other tasty treats to sample too. While here, you can also review our catering menu, and schedule a time for a free consultation and tasting. Call me at 719.597.6918 or 719.510.8731. Hope to see you!


Monday, December 12, 2011

If you believe in prayer...

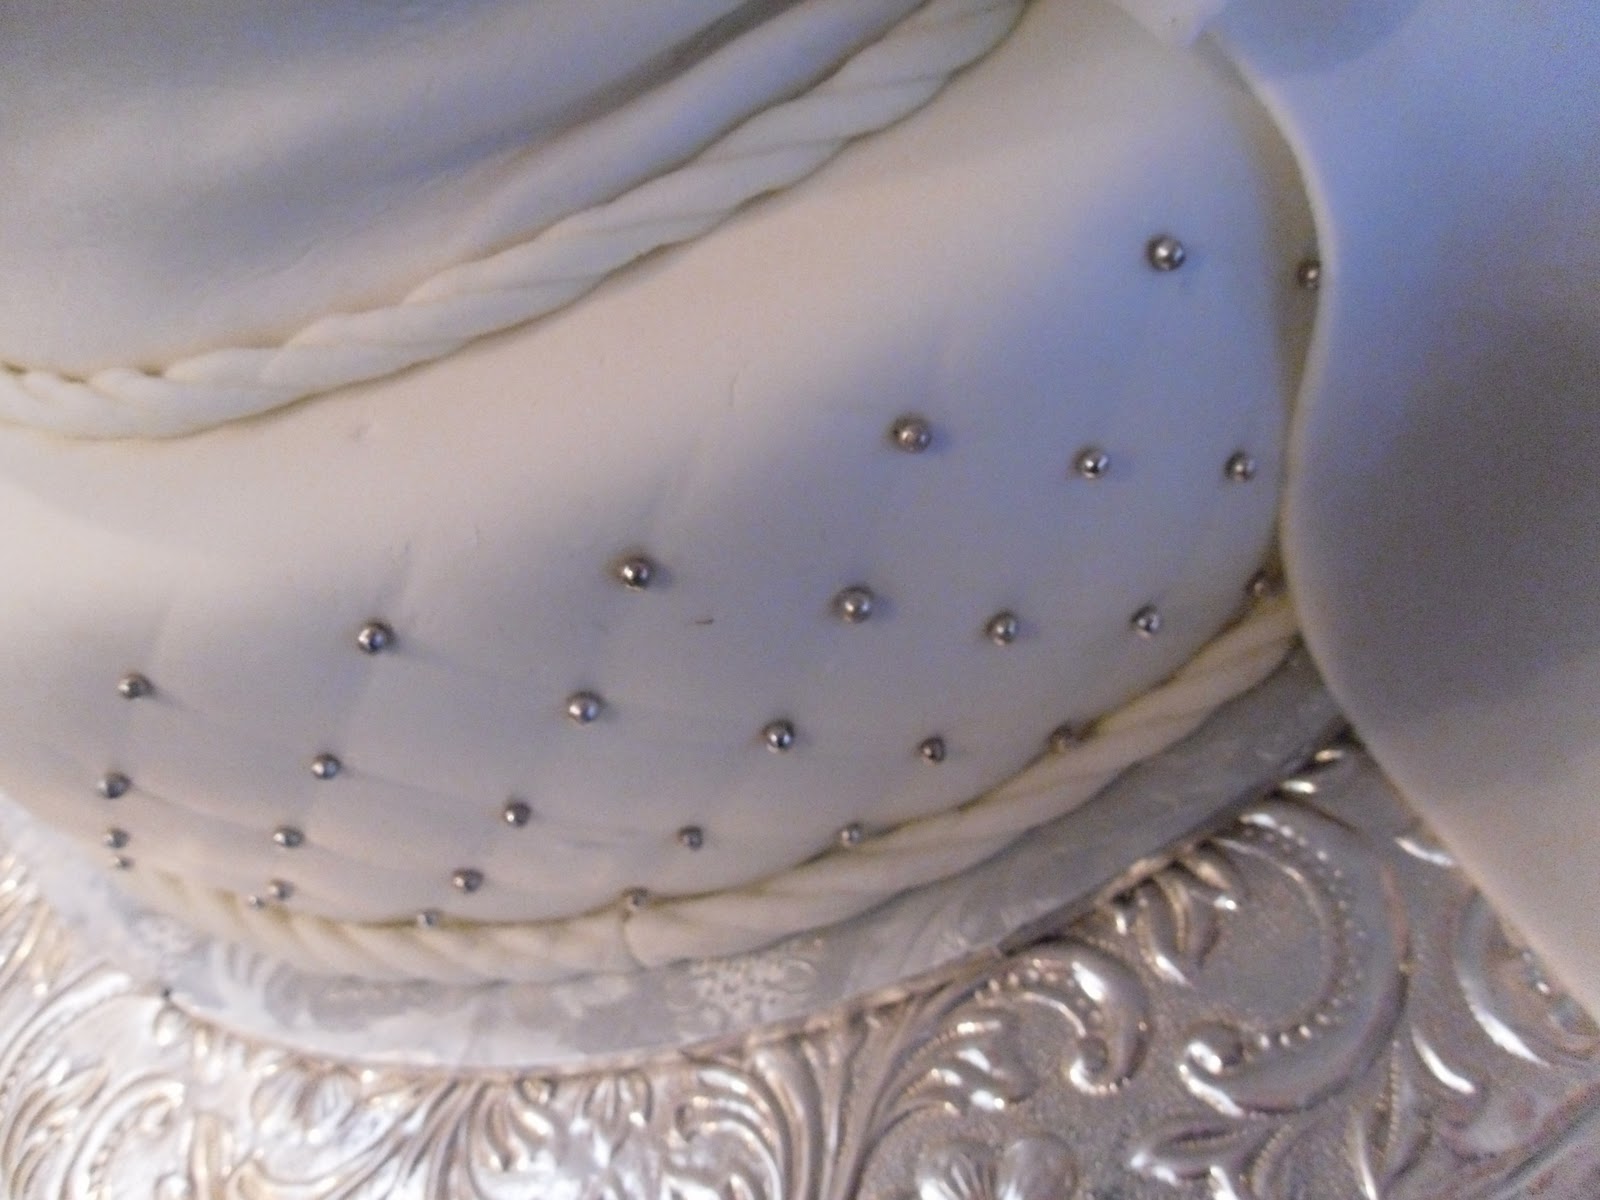
If you pray, you know that sometimes prayers aren't answered in exactly the way you plan. Such was the case last weekend when I was finishing up on a wedding cake. This was a 3-tier 6, 10, and 14 inch cake. The top tier and the bottom tier were done. The only decorations on the middle tier were a swagged ribbon and large bow. I had originally planned to use SugarVeil to make these with, but for some reason (probably because it was so cold in the kitchen), the SugarVeil was not setting up as quickly as I hoped. Finally, I said a prayer that basically asked that the SugarVeil set up quickly so that I could finish the cake. I waited as long as I could, tried finishing up on the decorations, and I was just not happy with the way they were turning out as the SugarVeil was still not set up as well as it should have been. Next idea... make the ribbon and bow from fondant... too limp. Last resort, make the ribbon and bow with part gumpaste and part fondant for added stiffness. I rolled the ribbon out and placed it on the cake with a little water, then cut out the bow and tails and put them in a plastic container to put on the cake after the tiers were set up. Final result... so much nicer than I would have ever expected. So you see, the answer to the prayer was that the SugarVeil did not set up, but I was forced to use my creativity for something that turned out much better. I later said a prayer of gratitude for the help I had received.


Sunday, August 14, 2011

Sheet cakes vs. specialty cakes...


So, over time I have developed a dislike for sheet cakes at weddings...a few reasons why...

  • they take up allot of room
  • they don't look all that great
  • only one layer of filling vs. two
  • square little piece of cake looks tacky on plate
  • usually not allot of variety
When my bride's want a smaller wedding cake, and want extra cakes to complete the number of servings needed, I now try to convince them to go with round specialty cakes instead of the sheet cakes. Not only do they look nicer, but serve up nicer, and give your guests more variety. The price is almost the same, and the results far superior, at least in my humble opinion. When I'm catering a wedding and also furnishing the cake, we have a separate table for the wedding cake (of course), and then at the end of the buffet table, I will set up the specialty cakes. That way, if the bride wants to wait for awhile before cutting the cake, the guests can still have a piece of cake early in the reception. I usually prepare about 3 different flavors, and set the cakes up on glass blocks. Some brides that are having more than one reception, will have their wedding cake at one reception, and then opt out for serving only the specialty cakes at another reception or open house. Also, for older brides or second marriages, some are going totally for the beautiful specialty cake set-up instead of a wedding cake. Some of my most popular flavors are chocolate lover's, raspberry fudge, carrot with pecans, strawberry shortcake, banana split, spice with cream cheese pecan, and Shirley Temple. Check out these pages on my website to read about each of these flavors...
 http://www.cathyleavittcreations.com/home/specialty-cakes
http://www.cathyleavittcreations.com/flavors

Specialty cakes in lieu of wedding cake...on separate table
Specialty cakes at end of buffet table

Friday, May 6, 2011

"Tweaked" marshmallow fondant recipe

Now that I've been making marshmallow fondant for some time, I've tweaked the recipe, and it comes out perfect every time. Of course, if you're new at making fondant, it will take a little practice like anything else. A couple of things I really like about marshmallow fondant is that you can basically add any flavor you want to it while the marshmallows are in the "soupy" stage, and I love the easy handling of the fondant because of the elasticity of the marshmallows. I have tried several "ready to use" fondants, and I always go back to using the marshmallow fondant.

Marshmallow Fondant Recipe
1 lb. mini marshmallows (use a good brand, and make sure they are fresh)
2 T. water
2 tsp. corn syrup
flavoring
5-6 cups sifted powdered sugar
Crisco


Pour marshmallows into a large microwave safe bowl. Add the 2 T. of water and mix. Heat on high for 40 seconds, stir and heat again for 40 seconds, stir one more time and heat another 40 seconds. Stir well, and add desired flavoring and 2 tsp. corn syrup. This mixture will be "soupy." Add 1 cup of the powdered sugar and stir well. In the meantime, measure out 4 cups of sugar onto a well greased surface. I have a silicone mat that works really well, but any surface will do. Make a well in the center to pour marshmallow mixture into. With a greased scraper, scrape the marshmallow mixture out of the bowl into the "sugar well." Grease hands generously and knead in the powdered sugar completely, scraping the surface as necessary, and adding more Crisco to your hands if it becomes sticky. Continue to knead until very smooth and elastic. You know you have added enough sugar if your fondant does not spread when you let it set for a few seconds. It will depend on the humidity...you will need to add more sugar if you are in a humid climate. I never add more than 5 cups total because we are in a very dry area. Once your fondant is done, coat the entire fondant with a layer of Crisco and then put it in a zip-lock bag and let it rest at room temperature overnight. When you are ready to roll it out, put it in the microwave for a few seconds to soften it. (I usually do it for about 20 sec., but it will depend on your microwave.) Knead it a little to make it pliable, and then roll it out on a lightly greased silicone mat. The reason I love the silicone mats is because the fondant will stick to the mat until you peel it off. This makes it easier to get the correct placement on your cake and you can also roll it out thinner without it tearing. Some decorators roll fondant out with cornstarch if they don't have a mat, but that tends to dry out your fondant. If you use this method, you will just want to drape it over the rolling pin and then position it on your cake. Before you put the fondant on your cake, be sure to have a good layer of buttercream frosting so the fondant will adhere to the cake. Smooth the fondant out carefully with hands, cut off excess with a pizza cutter, and then smooth again. Again, remove any excess around bottom. You can also use a fondant smoother, but I prefer the control and feel of using my hands. 

Chocolate Marshmallow Fondant
1 lb. mini marshmallows
2 T. water
2 tsp. corn syrup
1/4 - 1/2 cup baking cocoa (regular for rich brown, special dark for dark brown)
4-5 cups sifted powdered sugar
Crisco


Follow the directions for the regular marshmallow fondant, except mix in 1/4 cup cocoa along with the corn syrup. Mix 1 cup sugar into marshmallow/cocoa mixture and then pour into remaining 3 cups of sugar. After completely mixed and kneaded, coat with Crisco and let rest overnight. At this point, your fondant will be a medium brown color. The next day when ready to use, soften your fondant in the microwave, and then you will want to grease your surface well, and add about another 1/4 cup cocoa (a little at a time) with very well-greased hands and knead it in until smooth and shiny, and desired color. Keep adding Crisco to your hands to work in the excess cocoa. 

Marshmallow fondant...very smooth and easy to handle
Chocolate fondant...my favorite...smooth and shiny...almost resembles chocolate ganache...tastes like a tootsie roll


Monday, April 18, 2011

USAFA Bridal Faire...

After some mis-communications and not being able to participate last year, I was able to have a booth at this year's Bridal Faire at the Air Force Academy. I prepared most of the week (amid a house full of visiting grandchildren), and then set up on Friday morning. The event took place on Saturday between 10 and 3. I felt that it was successful and got some good contacts and leads, both prospective brides and vendors that will hopefully refer me. I was able to experiment some more with SugarVeil, which seemed to be very interesting to several visitors. Overall, a successful and hopefully profitable day...

My friend Nancy and I at our booth, getting ready for the Bridal Faire to begin.
Background display for booth, set up day before
Display cake
Display cake with SugarVeil lace over chocolate fondant. Lace made in SugarVeil silicone mat

3 out of 6 of sample cakes to taste...
SugarVeil heart piped on greased parchment over printed design...placed on chocolate fondant.
Cake was fudge marble with Bavarian Creme.
Chocolate mint with chocolate mint mousse and vanilla fondant.
Strawberry shortcake...yellow cake with whipped cream and fresh strawberries. Tried new Chantilly whipped cream stabilizer which worked like a charm...whipped cream held up through entire show.

Monday, March 21, 2011

Horse Cookies...


Last Saturday evening, we delivered a little 2 tier wedding cake for a small Sunday wedding, to a ranch in Peyton, CO.  The customer, Barb, was a  mature bride (actually she was exactly my age), who was a horse breeder. After showing her how to set up the cake stands, she asked if Bruce and I would like to go see the horses. So knowing how much Bruce would love that, we stayed a few minutes to visit with the horses. Barb gave Bruce and me each a handful of horse "cookies" that resembled hard little tootsie rolls, and off we went to meet and treat the horses. They were all beautiful. Barb introduced us to all of the eight horses, and gave us a brief history of each one. And I bet you thought cake deliveries were only about cakes, and that I only worked with sugar cookies. Now you know the rest of the story...

Monday, July 5, 2010

Brown and cream...nice wedding colors!

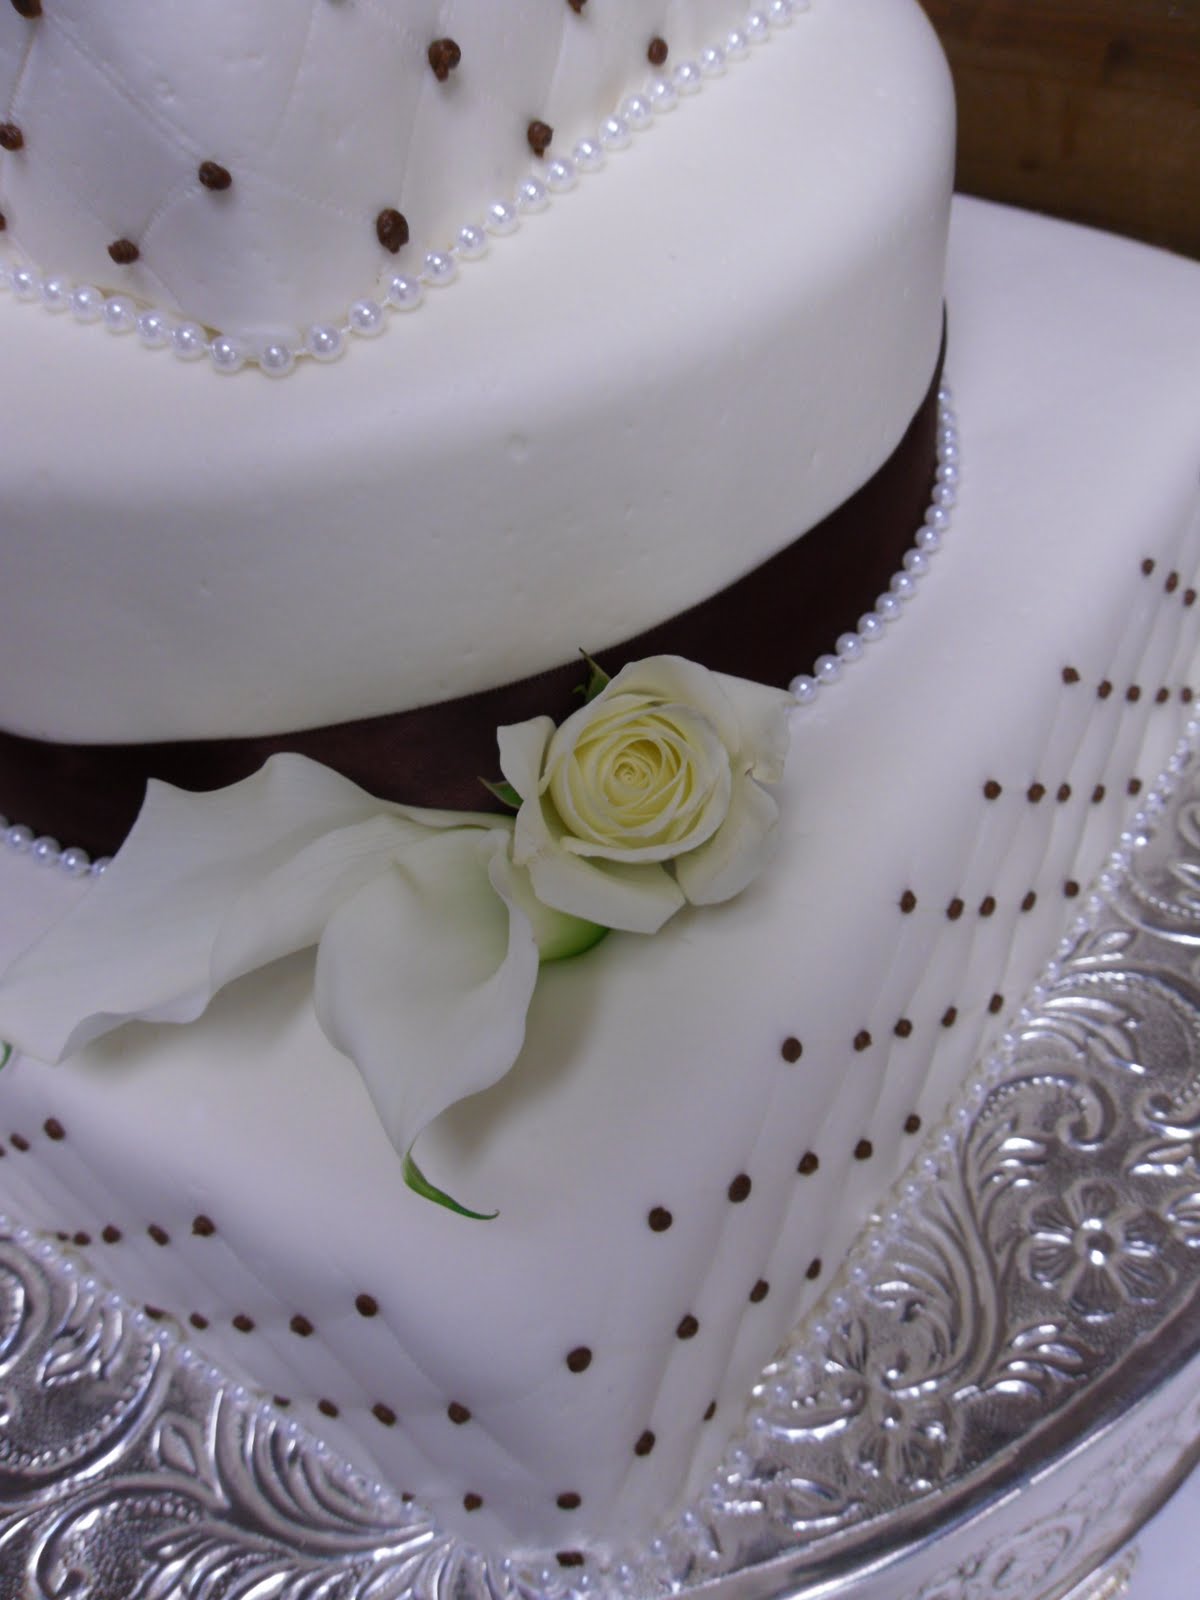
On Saturday afternoon, I delivered a wedding cake to Black Forest Community Center. This was the first time I had a delivery there, since the last wedding I had scheduled there was moved to another venue and time that I could not work with. The bride's wedding colors were chocolate brown and cream...very nice. The decorations and flowers on the cake were very simple, as well as the flavors...vanilla with vanilla cream and chocolate with chocolate mousse. The venue was kind of rustic, woodsy, and log cabiney...very different, but I liked it...an older building, but very usable for a wedding...good sized kitchen with very adequate facilities. One draw-back...no A/C, but in Black Forest, it doesn't really get all that warm, even in the heat of the day. They just had a fan blowing.

The quilt design on the cake is made with a plastic template that you press into the sides of the cake and then go over with a small fondant cutting tool. Chocolate buttercream dots were added where the diamond shapes came together. This design would not work well on a round cake, but turns out nice on square tiers.

Quilt template
Fondant cutting tool