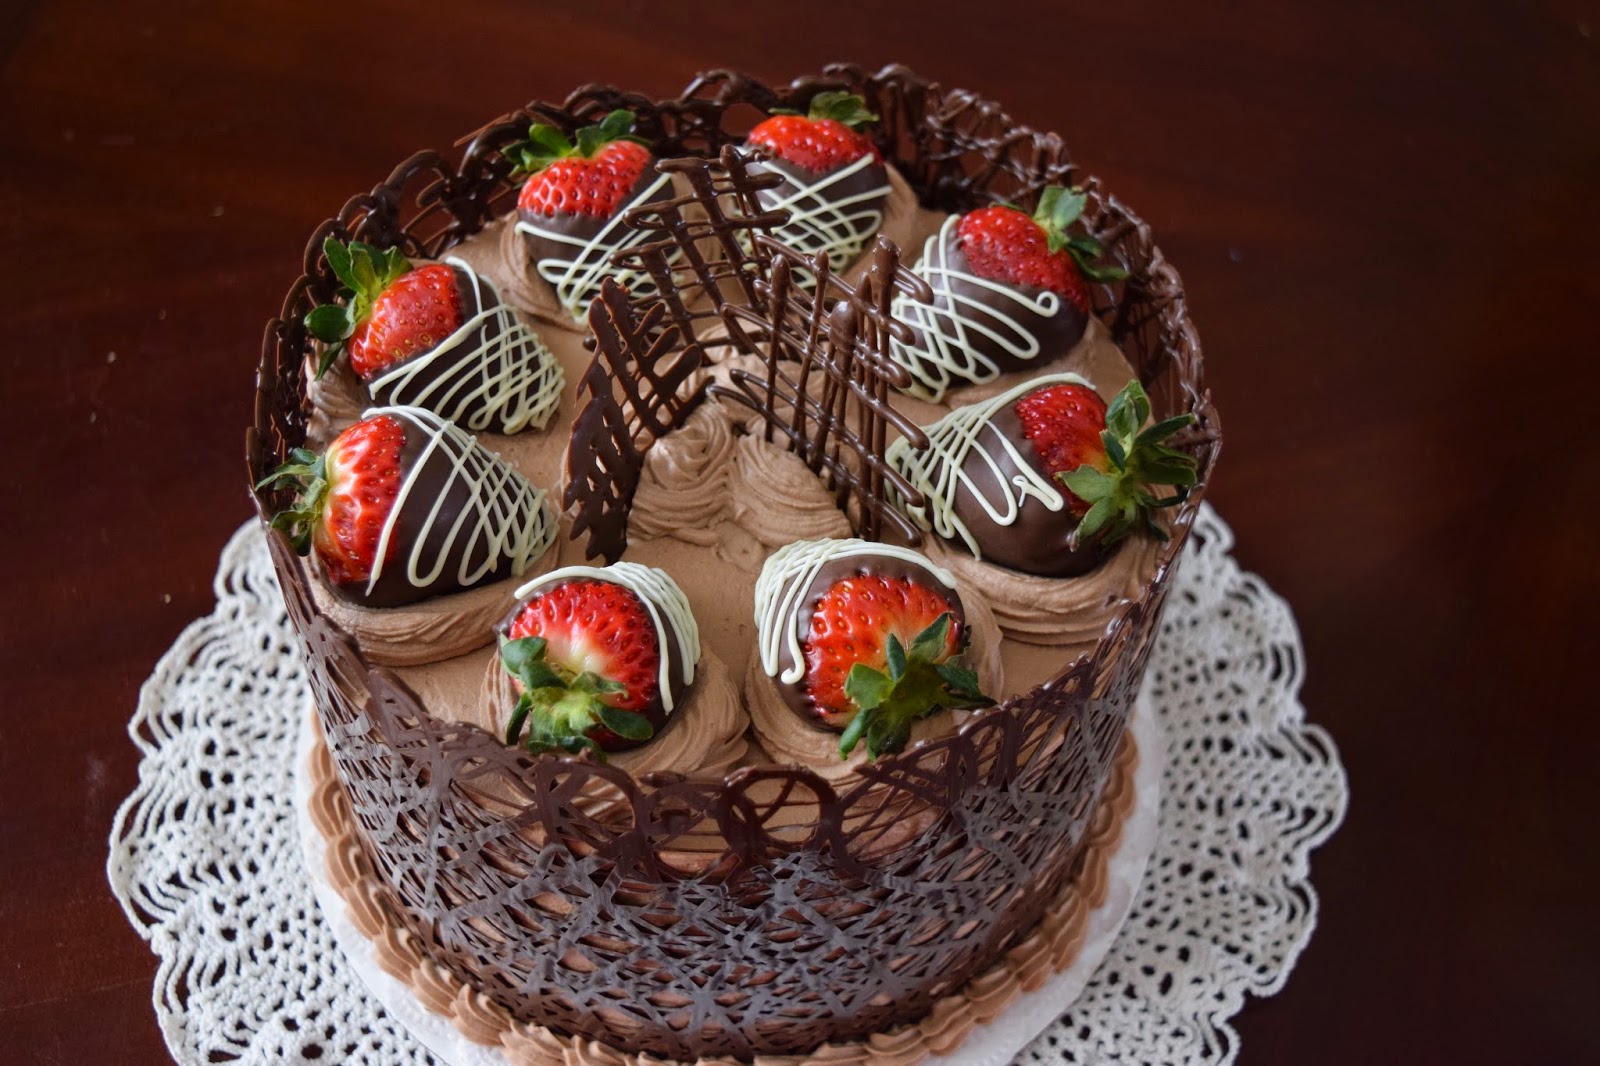
I have been wanting to design a cake with a chocolate cage for awhile, and today I finally had the chance. I didn't know quite what to expect as far as difficulty, but I was thrilled at how simple this technique was. And to see the final results... well, nothing less than amazing! My hubby thinks I'm absolutely crazy when I get so excited about food, but every now and then, it just happens. Nothing gets me more excited than when I have success with a new cake design! This particular cake was my strawberry shortcake flavor - rich yellow cake with 3 layers of whipped cream and fresh strawberries, iced in chocolate whipped cream. It was hard not to lick my fingers on this one, especially with the extra chocolate thing going on.
In case you would like to design a cake like this, I will attempt to talk you through it. For this particular cake, I used my favorite yellow cake recipe, baked it in (2) 8 inch round pans, and then sliced each layer in half. Between each layer, I spread a layer of real whipped cream, and sliced fresh strawberries. Then I iced the entire cake in chocolate whipped cream. I learned that the best way to make chocolate whipped cream is by adding cooled chocolate ganache to the cream during the last stages of whipping, then continue to whip until combined and stiff peaks form... yummy. After you have iced it smooth, pop it in the refrigerator to keep it cool. Next, wash and dry some nice strawberries. Make sure they are room temperature, then dip and decorate them. Set aside.

Before starting to make your chocolate cage, you need to know how large to make it. After your cake is iced, measure how tall it is, then use a ribbon or string to measure the diameter of the cake. Make sure you do this after the cake has been iced to allow for the extra size. For some reason, I actually came up just a bit short, so next time I would add a couple of inches. This was an easy fix, however, by just piping another small portion and adding it on at the end.


Cut a piece of acetate the size you need. In my case my cake was 5 inches tall (because of the 3 layers of filling and fruit) and 26 1/4 inches around. Since I wanted my chocolate cage to be a little taller than the top of the cake, I cut my acetate 6 inches high. I also cut it a little over 26 inches long, but I would add a couple inches next time. As far as acetate goes, it is best to use 3 mil, since it is easier to wrap. Since it is hard to find acetate around here, I cut a couple of laminating sheets the size I needed and taped them together. It worked fine, as long as I made sure that I piped on the shiny side. You can purchase acetate strips online, which I will do with my next order.
The next thing you need to do is melt your chocolate and prepare your piping bag. You can either use a parchment cone, or a piping bag with a tip, whichever you feel more comfortable with. I prefer a piping bag only because I have more control. When I am working with chocolate, I use a silicone piping bag. To make it easier to fill, I put it inside a glass and then pour in the chocolate. The chocolate I like to use is Ghirardelli dark dipping chocolate. It tastes great and I don't have to worry about tempering it. Another tip... recently I purchased two sets of small silicone bowls... I love silicone (the topic of another blog post). They are perfect for melting chocolate and isomalt, because when you're done, and the chocolate or isomalt hardens, it literally peels off the inside of the bowl and you have no waste.


Snip a tiny bit off the end of your parchment cone, or fit your bag with a small tip. I used a #3. On the precut acetate sheet (make sure it is a shiny side), pipe any design you wish. The idea is to make everything touch, and not to make it too flimsy, or it will break. Go over it in several different directions. Don't worry about going over the edges. After you are done, lift it up and allow it to set up in a different area, so you will have clean edges. Let it set up to the point where it begins to lose its shine, but is still flexible enough to bend around your cake. Mine set up very quickly, but it will depend on the kind of chocolate you use, and how warm it is. You can also do this on parchment paper, but it will not be as shiny as if you use acetate.


I also made some extra little chocolate garnishes for the top of the cake.

When the chocolate is set, wrap it around the side of the cake, pressing gently. At this point, you can pop it back into the refrigerator for a few minutes to make sure it is set. Mine set up so quickly on the cool cake, that I didn't need this step, but it was also quite cool in my kitchen. Once it is set, gently remove the acetate or parchment backing. Mine came off very easily. Then, stand back in amazement... it is so cool!


I finished my bottom edge with a piped border, but that is not really necessary as long as you clean off your cake board or serving platter. Finish your cake off with chocolate whipped cream rosettes, the decorated strawberries, and garnishes.


Get ready for your guests to be impressed, and give you lots of compliments!