Tuesday, July 24, 2012

Modeling Chocolate Recipe

PLEASE SEE UPDATE AT BOTTOM OF POST.

Modeling chocolate (or candy clay) is an easy and fun medium to use when decorating cakes. You can use it in candy molds, use it like regular clay to mold figures free hand, or you can use it in combination with fondant or gumpaste (50/50) to give the fondant better stability and flavor, and then use it for anything that you would use gumpaste for. It can be made with real chocolate or with candy melts. The tutorial that I'm posting today is made with candy melts. You can use dark chocolate, milk chocolate, white chocolate, or any other color.

12 oz. package Wilton candy melts (you can use any brand-just make sure you measure out 12 oz.)
1/4 cup light corn syrup

Pour candy melts into microwave safe bowl, and melt according to directions. Each microwave is different as far as power, but it usually takes me 1 1/2 minutes, stirring at 30 sec. intervals, until smooth. 
 Assemble tools and ingredients
 Only 2 ingredients needed - candy melts and corn syrup
 Pour candy melts into microwave safe bowl
 Stir after 30 seconds
 Stir again after 60 seconds
Final stir after 90 seconds - candy melts should be smooth

To allow corn syrup to pour out of measuring cup easily, coat the inside of the cup with vegetable oil spray. Measure 1/4 cup light corn syrup (any brand will do), and pour into melted candy melts. Mixture will begin to firm up immediately. Continue to stir until completely incorporated and mixture has formed a ball. Pour onto wax paper and allow to cool. When cool, put in zip-lock bag and allow to set over night at room temperature. When ready to use, take off a small piece, color as desired with food safe colors, and knead in your hands, until color is fully incorporated, and chocolate is pliable. Mold into desired shapes. 
 Use vegetable oil spray to coat inside of measuring cup
 Corn syrup will pour out of cup easier when coated
 Add corn syrup to melted candy melts
 Stir until fully combined and formed into ball
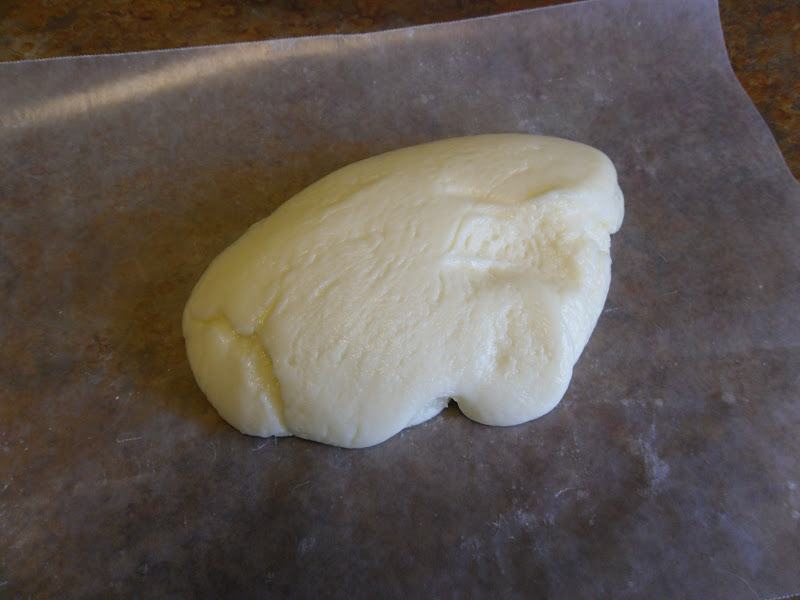
 Place on wax paper to cool
When cool, place in bag to cool at room temperature overnight

Here are a few examples of cakes items I have modeled with modeling chocolate...

 Hat, boots, and belt molded from modeling chocolate

 Booties made from 50/50 fondant and modeling chocolate
 Golf ball and tee molded from rice krispie treats and covered with modeling chocolate
Rope heart, garlands, hat, and horseshoes molded from modeling chocolate

UPDATE FOR MODELING CHOCOLATE RECIPE (DECEMBER 2016)

After making and using and loving modeling chocolate for many years, here are some tips that will help to make your recipe for modeling chocolate easier and almost fool proof:

1) My favorite brand of chocolate to use is Ghirardelli melting wafers, both white and dark chocolate. Use 1/2 cup corn syrup per lb. of wafers. 
2) If using colored candy melts, use 1/3 cup corn syrup per lb. of candy melts.
3) Be sure not to overheat your chocolate. It's best to stir the last few wafers until melted, instead of keep heating them up. 
4) Warm your corn syrup for a few seconds, so that both the syrup and chocolate are same temperature... just barely warm to the touch. 
5) If you need to color an entire batch, add the paste color to the corn syrup, stir, then add to the melted chocolate. 
6) Make sure all chocolate is incorporated without over-stirring.
7) Spread out chocolate mixture very thinly between layers of plastic wrap, and let set for no longer than 1 hour. When it is set, but still pliable, knead it into a smooth ball or log. Wrap tightly, put in zip lock bag, and let set until firm. It can usually be used in about 2 hours if necessary.
8) The modeling chocolate will be very hard. When you need to use a piece, you can put it in the microwave for no longer than 5 seconds to soften just a bit.  

More examples of modeling chocolate


Saturday, June 16, 2012

Finally ... a cake leveler that really works!

I received my new cake decorating toy yesterday ... my new Agbay cake leveler. It is amazing! I absolutely love it. Yes, it was expensive, but worth every penny. Sometimes, you just have to pay for quality tools and equipment. This thing is heavy, solid, steel, and MADE IN AMERICA!! Check it out at:


Ride 'Em Cowboy!

A client from Alabama that found my name online, called to order a cowboy baby shower cake for her daughter who lives here in the Springs. Her order was for a small 2-tier cake...the bottom tier should be white fondant with black cow spots, the top tier, denim look with a belt and buckle that says "Milam," the baby's name. On top of the cake she wanted baby cowboy boots and anything else western plus some daisies, since they were decorating with daisies. I had to do allot of research for this one. I actually ordered 3 chocolate molds that I thought might help. 2 out of the 3 arrived in time...the horseshoe mold is still on its way. The 3-D boot mold ended up being "life-size," so was definitely too large for the 6" inch top tier. My husband's idea was to scan the mold and then make it smaller. I'm still trying to figure that one out, since the mold is clear plastic and 2 part 3-D...hmmm. Anyway, I found an adorable baby cowboy boot pattern online, and just cut the horseshoes, belt buckle, and cow spots out with my Cricut Cake. I made modeling chocolate, and used half chocolate fondant, and half modeling chocolate for the belt, cowboy hat (which I pressed into a mold and then reshaped a bit), and rope border. I ordered a special basketweave rolling pin to make a denim texture, which didn't really work that well. The one thing I would have done different on this cake is to paint the denim color on with a brush instead of airbrushing it on. I think it would have looked more like denim. I played around a little more after the cake was completed, and that's what I decided. 


This is what I think I will do next time... basically same color, just a little different texture since you can see some of the white fondant through. Color is brushed on instead of airbrushed. I used navy gel paste instead of airbrush color. 
You can see how large this mold is by comparing it to my hand... and scanning it? I don't think so.


Saturday, June 9, 2012

Cake Pops for 1 Year Old...

Wow, this little girl must be loved allot...6 dozen cake pops and cake for her first birthday! Cake pops ... just a little bit of cake, but a whole lot of work. Colors were basically brown and pink with a little green accent. Four different flavors, each designated by a different color ribbon. Happy Birthday Hosanna!


 And her very own cake to smash and eat...

Saturday, May 26, 2012

Graduation season

Graduation...always the start of my busy season with graduation, change of command, weddings, and birthdays. Here's the latest graduation cake for a graduate from the AF Academy. The AF seal is made from my homemade gumpaste  and cut out on my Cricut Cake. All lettering is freehand except for the "United States of America." That is cut out of an icing sheet, using a scrapbook punch. The letters are then attached to the gumpaste with just a tiny bit of water. If you use too much water, the letters will dissolve. Next on the agenda... change of command cake for Thursday, and 6 dozen cake pops for Saturday.


Friday, May 11, 2012

Experimenting with New Recipes


I never tire of experimenting with new recipes, so when I get a request for a new appetizer for a catering job, I get really excited. Today, I tweaked a recipe for stuffed cucumber cups...turned out so yummy. I decided these could be done with a variety of nuts, even though the original recipe called for walnuts. So I tried almonds also, but still liked the taste of the walnuts when it was combined with the taste of the blue cheese. 


Here's the recipe...

Stuffed Cucumber Cups

1/4 cup crumbled blue cheese
1/2 cup cream cheese, softened
3 T. sour cream
1 T. minced green onions or chives
1/4 t. seasoning salt
1/2 cup chopped walnuts
2 cucumbers

Using a zester, score the length of each cucumber to create a striped effect. Remove the ends and cut each cucumber into 3/4 inch rounds. Using a small melon baller, scoop out the seeds from the center of each round to form a cup. Reserve a few of the walnuts as a garnish. Combine remaining ingredients and stir until well blended. Spoon the mixture into the cucumber cups and sprinkle with remaining nuts. Chill until serving time. 

Wednesday, May 2, 2012

Here's a sweet little tip ...

I saw on Pinterest awhile back how someone had used push pins to elevate something they were painting so that the bottom side would not touch the surface while it dried. So, when I was doing this baby shower cake last week, I thought, "why not try that with my cake decorating?" So when I was covering these cute little baby blocks, after I piped the icing on the bottom of the rice krispie blocks, I put 4 push pins in the bottom, and then decorated the rest of the blocks ... perfect. I left them there until I was ready to assemble the cake.