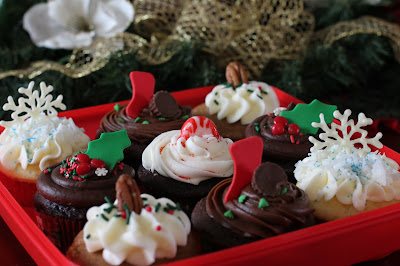
It's Christmas time and what better thing to decorate cakes, cupcakes, and cookies with than snowflakes. Also popular in the last few years have been "Frozen" and "Elsa" cakes. Snowflakes are the perfect way to finish these off or to add a quick pretty topper for cupcakes swirled with blue and white buttercream. I have several ways that I make snowflakes to decorate my creations - molds, fondant cutters, plunger cutters - but one of my favorite ways to make snowflakes is just to pipe them on a board using royal icing or melted chocolate. I like chocolate best because... well because it's chocolate and it just tastes better. They also set up quicker with a little help from the freezer. These snowflakes sometimes look more delicate than the cutter ones and are really easy to make. Start with a simple snowflake design, and duplicate as many as you want onto a page. You can download this pattern sheet of my favorite snowflakes to use if you wish. These should fill an 8 1/2 x 11 sheet of paper.
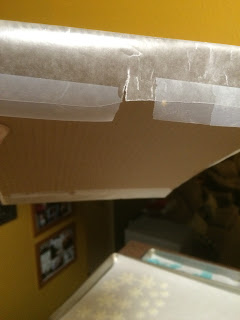
I tape my pattern sheet to a cardboard cake board, then tape a piece of wax paper over the the pattern sheet, fastening it on the back of the cake board. Now you can pipe the snowflakes directly onto the piece of wax paper. Fit a decorating bag with a #2 tip or cut a small opening in the tip of a parchment bag. Fill your bag no more than half full with icing or melted chocolate and carefully pipe over the snowflake designs. If you make a mistake, go ahead and scrape it off and do it over again. If you are using melted chocolate, you can pop the board into the freezer for a few minutes until the snowflakes are set. If using royal icing, just let the snowflakes set until hard. Then, carefully remove the tape from the back of the board, put your hand under the wax paper, and gently loosen the snowflakes. Then carefully pull each off and set aside until needed.
Attach pattern sheet to cake board and cover with wax paper.
Secure wax paper to back of cake board with tape.
This is my favorite white chocolate to use.
I have these great little silicone bowls that are great for melting chocolate.
Melt in 20-30 second increments, stirring after each.
Stir until smooth.
Fit decorating bag with #2 tip.
Fill decorating bag no more than half full.
Carefully pipe over each outline.
I usually pipe the straight lines first, and then the star part in the middle.
Complete entire sheet or as many as needed. Be sure to pipe extra in case a few break.
When you have completed piping, put the board into the freezer for a few minutes until set.
When set, carefully remove tape from back of board.
Gently loosen snowflakes from wax paper with your hand.
Carefully lift off each snowflake and put aside until needed.
Snowflakes on blue and white swirled buttercream.


No comments:
Post a Comment