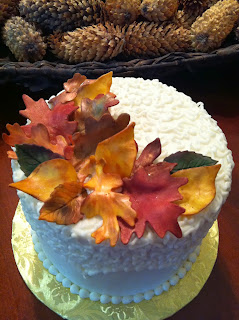
Oh, how I love the fall... the crispness in the air, the fall colors, and the leaves changing! One thing I always missed about living in Arizona was all the beautiful fall leaves... it just didn't happen. Being in Colorado, I look forward to this season every year. I designed a couple of pretty little cakes with fall leaves this year. I had lots of fun shading the leaves to look like something Mother Nature would do. Some of the leaves were modeled from modeling chocolate, others were part modeling chocolate and part gumpaste. I started with ivory color for some, and yellow for others. I think I liked the yellow ones the best. There are all shades of petal dusts and luster dusts to shade with. Just pick out ones that you think would best reflect what you see in nature. Some of my favorite are spiced pumpkin, mahogany, old gold, forest green, red velvet, and brown. One hint-make sure you get the kind that are "non-toxic" if you plan on eating the leaves. :) Roll your gumpaste/modeling chocolate out thin, but still thick enough to show the veins after using the veining tool. You can also use the back side of a real leaf as a veining tool. I found this out after I had made mine and I wish I would have used this method instead, as some of my veins disappeared when I thinned out the edges. Let your leaves dry on pieces of crumpled up foil, so they have more of a realistic look and movement. You need to let them dry at least overnight, so that when you shade them, they won't fall apart. Then just be creative! This is the fun part... just use straight colors or blend them. I just use the same soft brush for all the colors. So much fun to be creative with your decorating! That's one reason I love cake decorating.
Use crumpled foil to dry on
Be creative with your colors
Simple little 6 inch anniversary cake
8 inch birthday cake...I added some pine cones to this one
Here is a great little tutorial on making gumpaste leaves. Thanks to Alice Currah for sharing it. Fall leaf tutorial


No comments:
Post a Comment